


How to Unblur Text in Any Photo: Clear Up Blurry Words Fast
Blurry text in photos ruins important information and leaves it unreadable. It happens with scanned documents, screenshots, or photos of signs where the letters lose sharpness. In this guide, you'll go through the reasons for this issue, how to unblur text in images quickly, and the tips to avoid blur when you capture them in the first place.
Unblur Text Now!Part 1. What Causes Blurry Text in Image?
The problem starts right at the moment you try to take a photo of text. A lot of things can go wrong here. Let's discuss every reason for the blurry text in detail:
1. Low Image Resolution
If the image has a low resolution (few pixels), the text will not have enough detail to appear sharp. When you zoom in or display it on a large screen, the letters may look soft or pixelated because there isn’t enough pixel data to define clean edges.
2. Image Compression
Heavy compression (such as overly compressed JPEG files) reduces file size by discarding visual data. This can create artifacts around text edges, making characters look fuzzy or slightly distorted, especially in areas with high contrast like black text on a white background.
3. Upscaling a Small Image
When a small image is enlarged beyond its original size, the software must interpolate (guess) new pixels. This process often softens edges and reduces clarity, causing text to look blurry or stretched.
4. Motion Blur
If images were captured while the camera or subject was moving, this can lead to blurry text images. Text in the image may appear smeared or streaked because the camera sensor captured movement during exposure.
5. Focus Issues
If the camera lens was not properly focused on the text, the image will lack sharpness. Autofocus errors or shallow depth of field can cause text to appear soft while other parts of the image remain sharp.
6. Anti-Aliasing or Rendering Settings
In digital graphics, text is often smoothed using anti-aliasing. While this reduces jagged edges, it can sometimes make small text appear slightly blurred, especially on low-resolution screens.
7. Screenshot or Screen Scaling Problems
Text may look blurry if:
- The screenshot was taken from a scaled display (e.g., 125% or 150% scaling)
- The image was resized after capture
- The display resolution does not match the image resolution
This mismatch can reduce clarity and sharpness.
8. Low-Quality Image Editing or Export Settings
If the image was exported with low quality settings, incorrect DPI, or improper color profile adjustments, text sharpness may be reduced. Poor editing workflows can unintentionally soften text.
Part 2. How to Unblur Text from Photos Using HitPaw AI Photo Enhancer
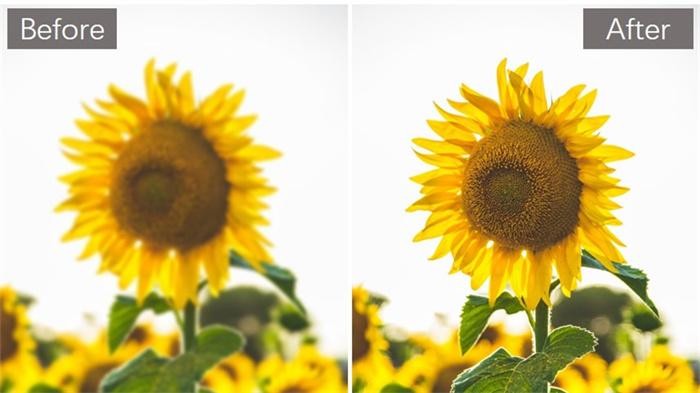
If there is blurred content in the photo, whether you've captured it through a smartphone or a regular camera, HitPaw Online AI Photo Enhancer offers you a quick way to unblur it. The tool has a dedicated AI Text Model that sharpens the letters and brings clarity back to blurred writing. The interface is simple, easy to follow, and you don't need to dig through any complicated options. It's built precisely for situations where words in a photo need to be readable again.
Unblur Text Now!So, here is how to unblur text in your captured images using HitPaw AI Photo Enhancer:
Step 1. Upload Your Image to HitPaw
Start by visiting the HitPaw Online AI Photo Enhancer website. On the main screen, you'll see a clear upload box labeled "Upload". You can either drag your photo into this box or click it to browse for a file from your device. There's also a Dropbox option to upload the image if it is stored there. Make sure the photo you upload includes the blurred text you want to recover. Once it loads, the preview appears on the right pane, and you can move to the next step.

Step 2. Select the AI Text Model
On the left-hand side, you'll find a list of AI models. These include Face Model, General Model, Calorie Model, and others. For this task, scroll to the bottom and click on "Text Model" to make it active. This is designed specifically to fix blurred writing in documents, signs, and screenshots.
Step 3. Download the Unblurred Text In the Photo
Once the preview is complete, scroll to the bottom panel where you'll find your processed image. Click download next to it. Your enhanced photo saves to your device in full resolution with the improved text. If you need to edit it further, you can use any of the AI models to further enhance its clarity; however, the Text Model is enough to do the job the first time.
Unblur Text Now!
Part 3. Tips to Capture Clear Text In Photos
Before you worry about unblurring the text part in your captured photo, try to capture it right in the first place. Here are a few simple hacks that can make all the difference. You don't need professional gear. You just need to take a few precautions to improve how your phone handles text in images to capture clear letters.
Use Proper Lighting
Lighting affects how clearly text appears in your photo. If the image is underexposed or full of shadows, the camera may miss the edge of the letters. This creates dark zones or faded text. Good lighting helps avoid those issues and brings out sharp contrast. You can stand near a window or place the light source behind you.
This technique also helps to avoid harsh direct light since it can create glare or reflections on the surface. Even light across the page or object improves how the camera reads the text. If the room is dim, use a lamp or flashlight.
Hold the Camera Steady
Any small shake of the hands ruins the clarity of letters, blurs the outlines, and overlaps the strokes in each word. So, it's better to use both hands when holding the phone. You can also rest your elbows on the table or wall to avoid extra motion.
Another thing you can try is to enable the timer on the phone to capture the image without movement from your fingers. This creates a more stable result, where each letter appears clearly and holds its shape apart from the background. That small difference in steadiness helps preserve the sharpness of written content in your photo.
Adjust Camera Focus Manually
Blurry text often appears when your phone focuses on the wrong part of the image. So, before taking the photo, tap the part of the screen that holds the text. This sets the focus exactly where it's needed and prevents the camera from locking onto a background object.
Some phones even show a square or indicator to confirm focus. Once that's done, try not to move the device while you capture the shot. That way, you get the letters sharp and avoid any confusion between foreground and background. It also prevents auto-focus from picking up some nearby object instead of the actual text you want.
Avoid Zooming In Too Much
Digital zoom reduces clarity and weakens how letters appear in the image. Instead of zooming in on the image, it's better to move the phone closer to the text. That way, you capture the full resolution without overstretching pixels.
On the other hand, optical zoom performs better than digital zoom, but it still lowers the quality in low-light shots. If your camera has optical zoom, you can use it, but otherwise, rely on getting physically closer for better results.
Enable High-Resolution Mode
Many smartphones these days have a setting in the camera app to capture images in high quality, which helps capture small details in text. Before taking the shot, switch to that mode in your camera settings. It records more pixels and strengthens how sharp each letter appears in the text.
A few phones also include a document mode that adds contrast and flattens the color balance. This mode improves text clarity without needing extra editing after the photo is saved. Therefore, it is best to use it regularly when snapping pages, printed labels, or instruction manuals.
Scan Instead of Snap
If your goal is legibility, then you should use a scan app rather than the default app to capture the text because it can do so with more precision than the regular camera mode. The scan app can detect edges, straighten corners, and adjust brightness to bring out every word clearly.
The good news is that there are many good scan apps available on the Play Store or App Store, which you can install on your phone to scan receipts, printed pages, or documents. The result is usually flatter and sharper, with text that stays readable even after zooming in or exporting.
Part 4. FAQs of How to Unblur Text
Q1. Is there a way to unblur blurred text?
A1. Yes, there are several ways to unblur blurry writing. You can use desktop software or online platforms that run in your browser. These tools improve clarity through sharpening and resolution enhancement. HitPaw AI Photo Enhancer is one option that includes a dedicated Text Model designed to fix unreadable letters.
Q2. Why is text blurred?
A2. Text gets blurred for two main reasons. During capture, poor focus and low resolution reduce sharpness. After that, applying filters, resizing the image, or compressing it too many times damages the edges of the letters.
Q3. How to unblur text in an image online?
A3. To unblur text in an image online, you can use a tool like HitPaw AI Photo Enhancer. Just upload your image to its web platform, select the AI Text Model, and process it. The tool restores clarity to the letters and removes the fuzziness, so the text becomes readable again in just a few quick steps.
Q4. What are the best extensions for unblurring writing?
A4. The best extensions to read blurry text from image are reader-mode extensions like Reader View or Readability, zoom/magnifier extensions that enlarge text, and contrast-enhancing extensions such as Dark Reader.
Q5. How to see covered text?
A5. If the text is hidden on a webpage using simple visual methods (such as CSS blur or an overlay), it may sometimes be visible by adjusting display settings or disabling certain page elements. If it’s blurred inside an image, recovery is unlikely. Basic blur can be partially improved using image enhancement tools like HitPaw Online AI Photo Enhancer. If the blurry content is protected, removed, or behind a paywall, it cannot be accessed without proper permission.
Q6. How to see blurred text on screenshot?
A6. If you want to try improving blurry text messages in a screenshot, HitPaw Online AI Photo Enhancer can help enhance clarity. It uses AI to sharpen and improve image details, which may make light blur easier to read.
Conclusion
In this article, you've seen exactly why text gets blurry when you capture it using your smartphone or camera. We broke down the common issues like poor focus, low resolution, compression, and distortion. You also got to know how to unblur text in a photo using HitPaw AI Photo Enhancer and its Text Model that clears out the letters in seconds. Not only that, we shared tips to help you capture clear text the next time, so you don't have to deal with this problem again. Once you know where the blur comes from, fixing it becomes much easier.
Unblur Text Now!


Home > Learn > How to Unblur Text in Any Photo: Clear Up Blurry Words Fast
Select the product rating:
Natalie Carter
Editor-in-Chief
My goal is to make technology feel less intimidating and more empowering. I believe digital creativity should be accessible to everyone, and I'm passionate about turning complex tools into clear, actionable guidance.
View all ArticlesLeave a Comment
Create your review for HitPaw articles