Master Color Grading in Final Cut Pro: A Step-by-Step Guide
Color grading is the final process when editing a video, giving creators more depth in visualizing their works. Professional video editing software such as Final Cut Pro is the best for providing the color grade. This post will focus on two sure methods of color grading: color wheels and color curves. In the end, we will discuss a hit-and-miss alternative for ease of editing compared to Final Cut Pro color grading: the HitPaw Online AI Photo Enhancer.
Part 1: What Is Color Grading in Final Cut Pro?
Color grading manipulates your footage's colors, contrast, and tones to create a particular mood or aesthetic. As color correction takes care of exposures and white balances, among other things, color grading brings along an artistic feel and depth in storytelling. For example, a warm tone may lean towards being almost nostalgic, and a cool tone might begin to attain mystery or tension. Through advanced Final Cut Pro color grading tools, the difference lies between half-baked videos that fail to capture their intended story and winning movies that stir the audience's hearts.
Key Advantages of Color Grading in Final Cut Pro
- Enhanced Visual Storytelling: Use colors to enhance the mood and tone of your video. This makes your story more captivating and emotionally powerful.
- Professional-Looking Footage: Turn raw clips into polished visuals, giving them a cinematic and high-quality look.
- Consistent Aesthetic: Ensure your project has a unified color palette that looks professional and coherent.
- Creative Freedom: Playwith different hues, contrasts, and tones to create unique visual styles and artistic expressions.
- Improved Viewer Experience: Capture attention and elevate the viewing experience with visually appealing and vibrant footage.
Part 2: Preparing for Color Grading in Final Cut Pro
Setting up your project properly is essential before diving into the Final Cut Pro color grading process. Here are the key steps:
Import Your Footage
Start with high-quality footage. Ensure your clips are well-lit and properly exposed to give yourself a solid foundation for color grading.
Organize Your Timeline
Order your clips in the timeline in the proper order. Proper order helps streamline editing and ensures you can pay attention to grading instead of getting stuck on organizing footage.
Apply Basic Edits
First, you'll make some basic edits, including exposure, contrast, and white balance. These adjustments will give you an even baseline as you grade your footage.
Part 3: Method 1 - Using the Color Wheels for Final Cut Pro Color Grading
Color wheels are one of the most potent Final Cut Pro color grading tools. Here's how to use them effectively:
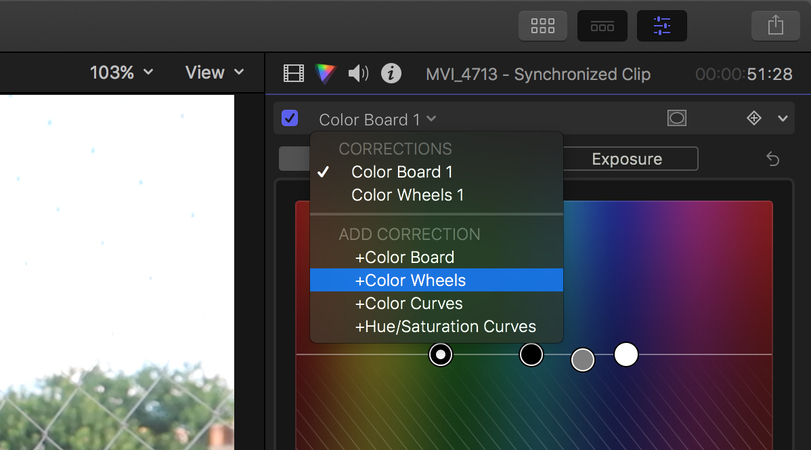
Step 1: Open the Color Inspector
Select your clip and click on the Color Inspector at the top-right panel. Then, choose Color Wheels from the dropdown menu.
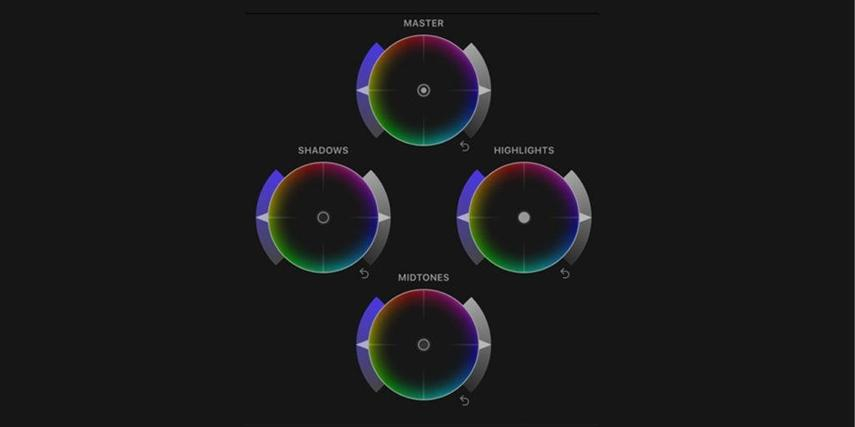
Step 2: Adjust Shadows, Midtones, and Highlights
Use the shadow, mid-tone, and highlight controls to adjust the brightness and saturation of specific tonal ranges. Drag the shadow wheel toward blue for a cooler tone or toward orange for a warmer look.
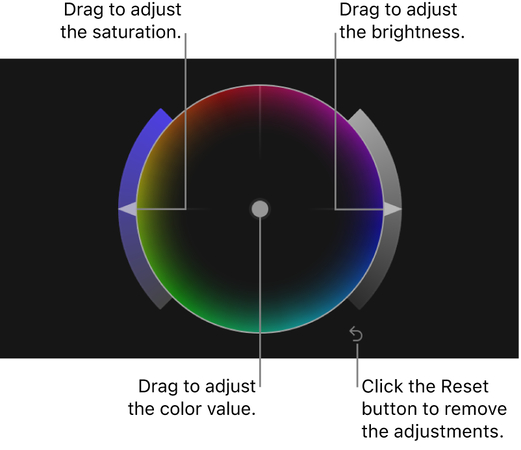
Step 3: Modify Global Color
The global wheel will allow changing your clip's overall color during color grading for Final Cut Pro. Use the hue and saturation controls to get an image that suits your vision.
Step 4: Fine-Tune the Exposure
Use the sliders directly under each wheel to brighten, drop shadows, adjust mid-tones, and raise highlights.
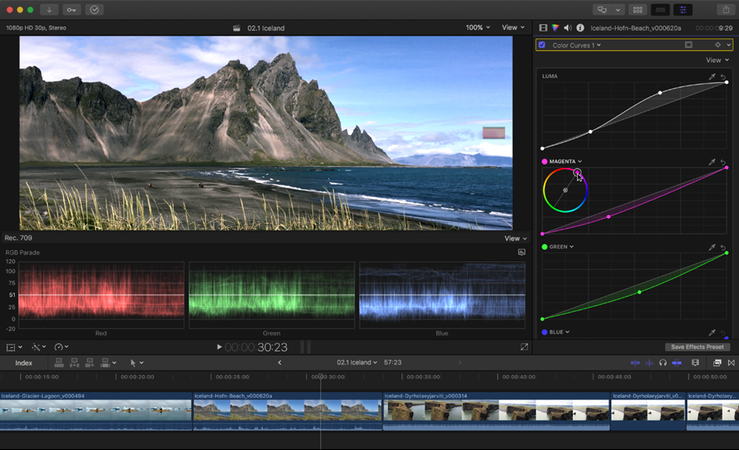
Part 4: Method 2 - Using Color Curves for Final Cut Pro Color Grading
Final Cut Pro color grading curves enable you to be highly specific when adjusting colors, allowing precise modifications to tones and hues. Let's walk through how to apply them:
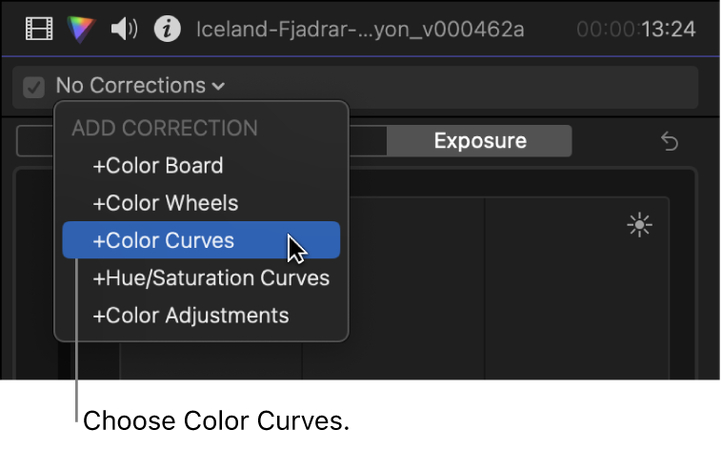
Step 1: Access the Color Curves
Select your clip and navigate to the Color Inspector. From the dropdown menu, select Color Curves.
Step 2: Luma Levels
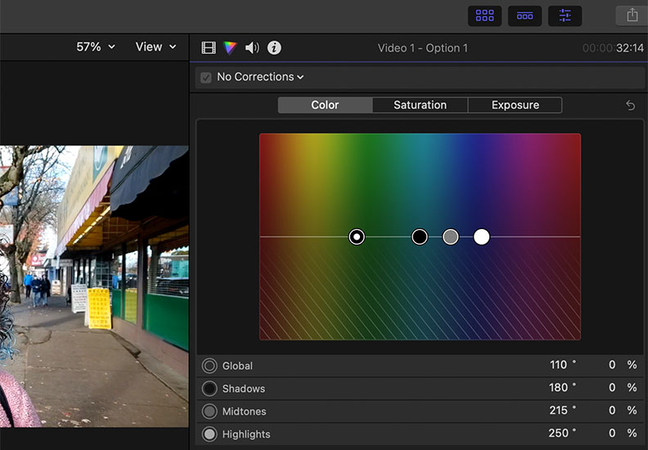
The luma curve controls brightness. Pull the curve up to lighten the image or down to darken it.
Step 3: Modify RGB Channels
Pull the red, green, and blue curves up or down to create custom color tones. For example, pulling the red curve in the highlights will warm your footage.

Step 4: Target Specific Colors
Use hue vs. saturation and hue vs. hue curves for color grading on Final Cut Pro to lock in and target specific colors; this is particularly well-suited for boosting skin tones or changing the color of a sky.
Part 5: [Bonus Tool] Final Cut Pro Color Grading Alternative: HitPaw Online AI Photo Enhancer
The last, easiest alternative of Final Cut Pro color grading is that color grading was made even simpler and accessible for all through the use of the HitPaw Online Photo Enhancer. Here, some new AI technology shall be used on your images, enhancing them with a good amount of simplicity and accuracy. It is ideal for the novice and pro alike, delivering professional-grade outputs just a few clicks away from the complications of manual tweaking. HitPaw boosts the colors, contrast, and sharpness in creating breathtaking photos and videos, regardless of whether they are being processed.
Key Features of HitPaw Online AI Photo Enhancer
- AI-Powered Enhancements: Automatic color scan and adjustment of contrast and sharpness to deliver professional quality in seconds.
- User-Friendly Interface: An intuitive user interface for any newbie or pain-free solution.
- Supports Multiple Formats: It can work with several file formats, supporting any type of project.
- No Software Installation Required: It is web-based,so there is no need to download or install extra software.
- Quick and efficient: Previewinglive will enhance the visuals, while fast processing means you can make picture edits from anywhere.
How to Use HitPaw Online AI Photo Enhancer:
Step 1:Visit the AI HitPaw Online Photo Enhancer website. Upload your image by clicking the "Choose Image" button to browse files or drag the image into the upload box.

Step 2:After uploading the image, the AI tool will automatically begin processing it. Depending on the size and details of the photo, this step may take just a few moments.

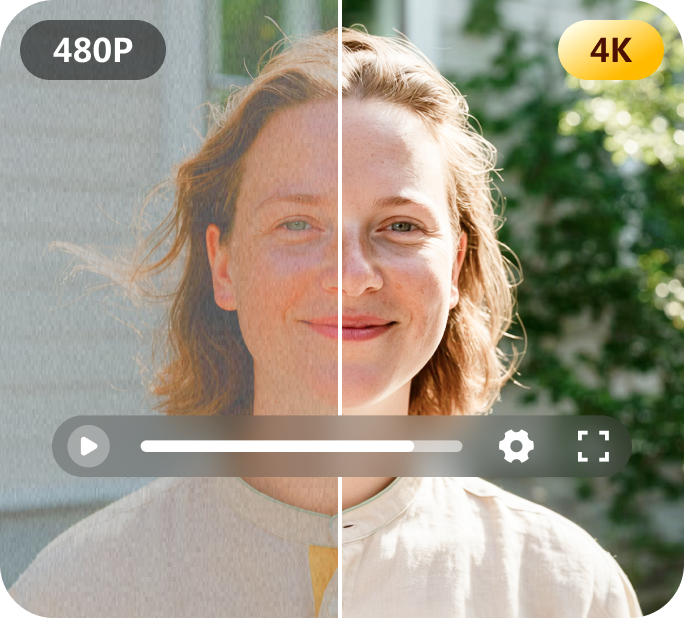
Step 3:Once the enhancement is done, you can see both the original and enhanced versions side by side. You can easily toggle between them to check how much clearer and improved the image is.

Step 4:When you are satisfied with the enhanced image, click the "Download" button. Your high-quality photo is now ready to download and use!

Part 6: FAQs about Cut Pro Color Grading
Q1. Can beginners use Final Cut Pro for color grading effectively?
A1. Well, color wheels and curves in Final Cut Pro are also accessible to novices for practicing the basics. All you need is a simple tutorial and some practice.
Q2. What are LUTs, and how do they help in color grading?
A2. LUTs are pre-defined Final Cut Pro color grading presets that can be applied to footage quickly to achieve a specific look. They are excellent for maintaining consistency.
Q3. Is there a way to undo color grading mistakes in Final Cut Pro?
A3. Using Reset under the Color Inspector or using the Undo command step-by-step through using Command + Z will revert your changes.
Conclusion
Final Cut Pro color grading is one of those master skills for taking your video projects to the next level, from applications in versatile color wheels to precise color curves. But sometimes less effortful approach to AI-driven color grading is needed, one of the best and easiest options to go through for such professional results is the HitPaw Online AI Photo Enhancer. Get creative today with these techniques and take your visuals to the next level into incredible works of art!
Try It Now!


Home > Learn > Master Color Grading in Final Cut Pro: A Step-by-Step Guide
Select the product rating:
Natalie Carter
Editor-in-Chief
My goal is to make technology feel less intimidating and more empowering. I believe digital creativity should be accessible to everyone, and I'm passionate about turning complex tools into clear, actionable guidance.
View all ArticlesLeave a Comment
Create your review for HitPaw articles