How to Use Camtasia to Record Your Screen and Edit Your Captured Clip
If you want to create screen recordings that keep viewers engaged, you are going to learn how to use Camtasia to capture and edit your screen like a pro. You'll discover a few interesting dynamic effects, too, that you can add to help your videos stand out. So let's jump in.
Create Now!Part 1. What Is Camtasia Software?
Camtasia is sort of an all-in-one tool to be able to record your screen, record yourself, edit it, and export it, and kind of do everything all together. TechSmith develops it, and the main focus is to help you with recording and editing tutorials or training content.
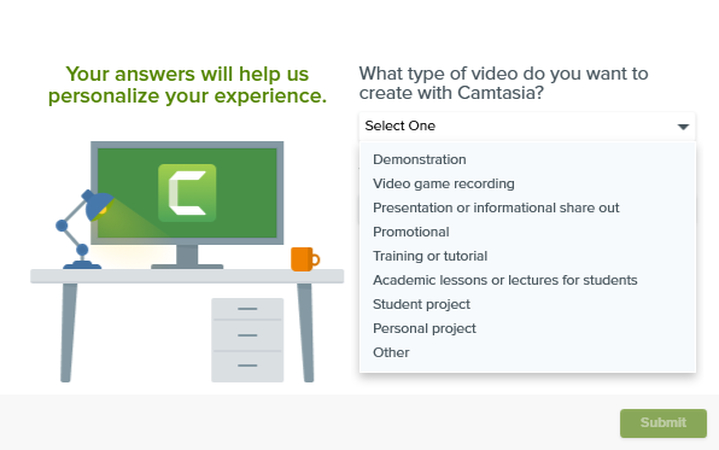
You can use the free trial to see how well it works, but you can also purchase a subscription, which unlocks all features and removes the watermark.
Once you download it from the Camtasia website, the installation is quite easy, as you just have to fill in a few details like selecting your language, agreeing to licensing terms, etc. After it is ready to go, you can start right from there.
Part 2. How to Use Camtasia to Record Your Screen?
Camtasia has been around for a long time and is a popular software for screen recording as well as editing it. Here are the steps to know how to use Camtasia to record your screen:
Step 1. Selecting the New Recording
So you get a couple of options when you first launch Camtasia on your PC. To record the screen, go to New Recordings.
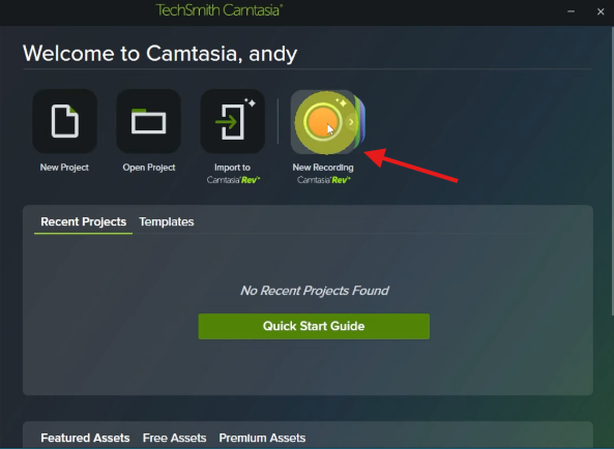
You are going to go to New Recording, and it is going to open up a new pop-up with your screen, webcam, microphone, and system audio options.
Step 2. Configuring Screen Recording Options
As you are recording the screen, click the Screen option, and you have a couple of different options. You can do just the full screen. If you have a couple of different monitors, you can also select a region, which opens up a way of highlighting a certain section of your screen that you want to record.
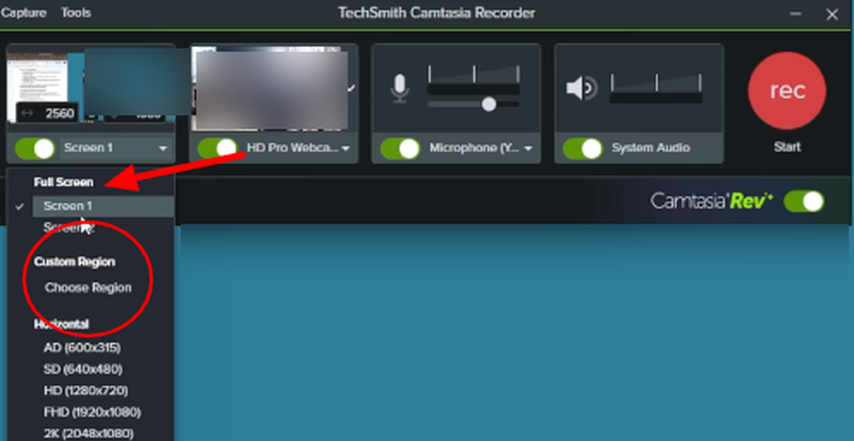
Camnesia also offers you presets. For example, if you are going to record a video that you want to put on any social media, you can choose between a horizontal, vertical, or square format, and it will create a screen recording in exactly that format.
If you are going to do a full-size monitor recording, then select your camera. You can see your webcam selected there. It also lets you pick your microphone and your system audio, so you just want to make sure you select the correct devices. If you have multiple microphones plugged in, you want to make sure you select the right one.
Once everything is set, all you have to do is hit Record (the red rec icon).

Step 3. Recording and Stopping the Screen Capture
Now, you are going to see a countdown, and then the recording is active. As you record, you can talk, maybe demonstrate some things, click around, and show how to do something, whatever you want to capture.
You'll see a small toolbar that pops up showing how long you have been recording, along with a Stop button.
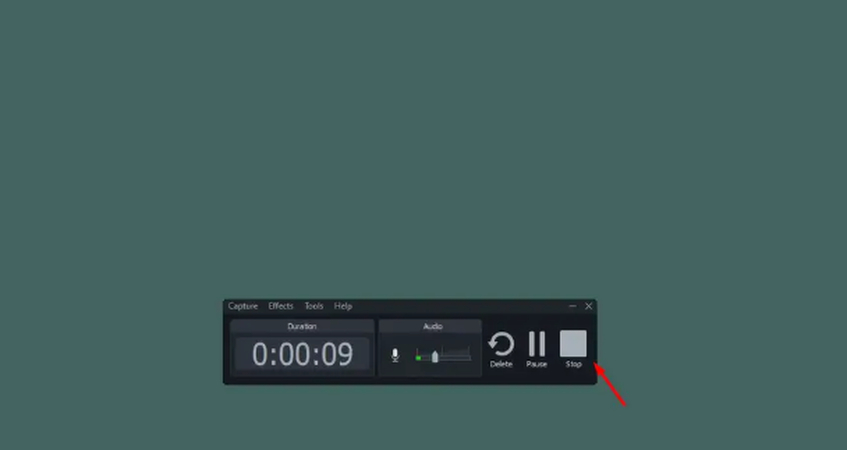
When you click the Stop button, it automatically opens the recording in the editor, and this is where the real power of the software comes into play.
Part 3. How to Use Camtasia to Edit Your Screen Recording
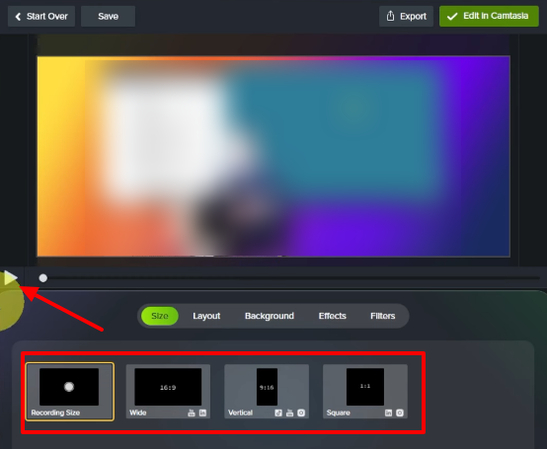
After the recording stops, Camtasia shows you a preview of what you just captured. Some elements are already applied automatically. Your screen recording appears on the canvas, and your camera footage is shown as a cutout, and in case you are in the capture, you appear in front of the screen instead of covering it.
You can play the preview to review the recording. At this stage, you can also decide to change the format. If you want the video in a vertical or square layout, you can adjust it before editing further.
Step 1. Opening the Camtasia Editor
To start making changes, click the Edit in Camtasia option.
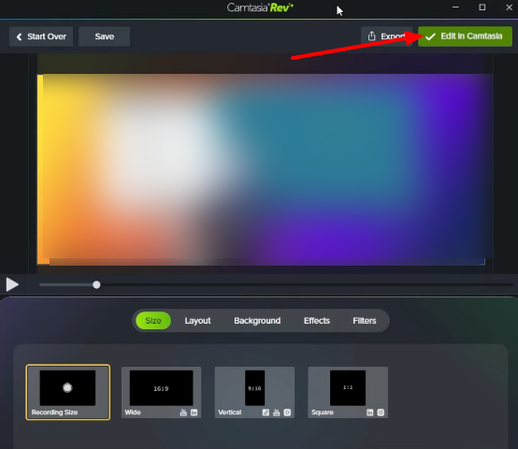
When the editor opens, the interface may feel overwhelming at first, but each section has a specific purpose, and you will go through what each part does step by step.
The editor is made up of different windows, and you can adjust them as needed. By hovering over the edges, you can make each window bigger or smaller so the layout fits the way you want to work.
At the top, you have the preview window. This shows what you are looking at and what your final video will look like. On one side, there are tools and effects that you can add, and nearby are options used to make adjustments to individual clips.
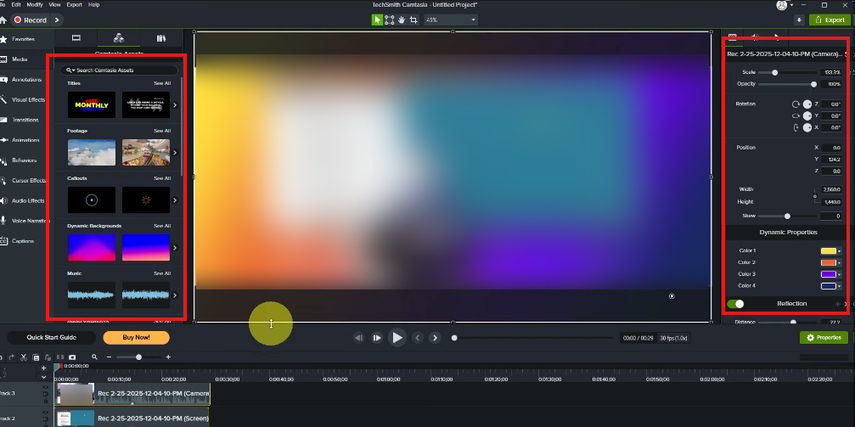
At the bottom, you have the timeline. As the video plays, a marker moves along it to show the current point in the video. When you stop playback, that marker shows exactly where you are. The timeline represents the full length of the video, with the screen recording and the background stacked in layers.

Step 2. Reviewing the Raw Screen Recording First
Before editing anything in Camtasia, the first step is to watch the raw screen recording from start to finish. During playback, you maynotice awkward pauses, repeated takes, mistakes, and moments where nothing is happening. This is normal in screen recordings. You can use the seek bar, timestamps, or skip ahead if needed, but watching the full recording helps you understand what needs to be edited out later.
Step 3. Enhancing Audio Quality
Before editing the visual elements, you need to enhance the audio because this is one element that affects the entire recording, so applying it before editing saves time later.
Start by selecting the full clip in the timeline. Open the Audio tab in the Properties panel. This section allows you to adjust gain, volume, and other audio settings. Camtasia has Audiate, which transcribes audio and allows editing with text, but applying audio effects is a better option.
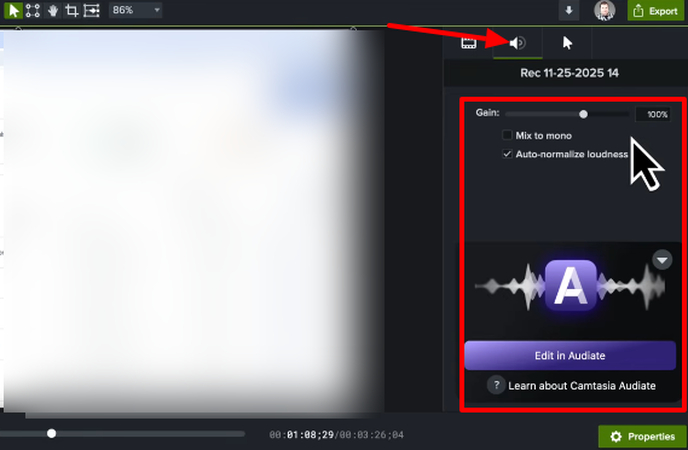
Open Audio Effects from the effects panel. Two commonly used effects are AI Noise Removal and Audio Compression.
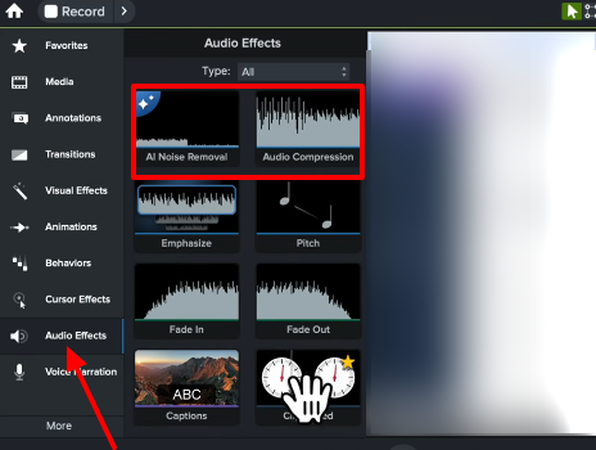
AI Noise Removal isolates voice audio and removes background noise such as fans or hums. Drag the AI Noise Removal effect onto the clip. The effect appears in the Audio tab and usually works well without adjusting any settings.
Applying this effect before cutting clips ensures it applies to the entire recording at once.
Audio Compression can slightly enhance audio levels, but it is optional and not always necessary.
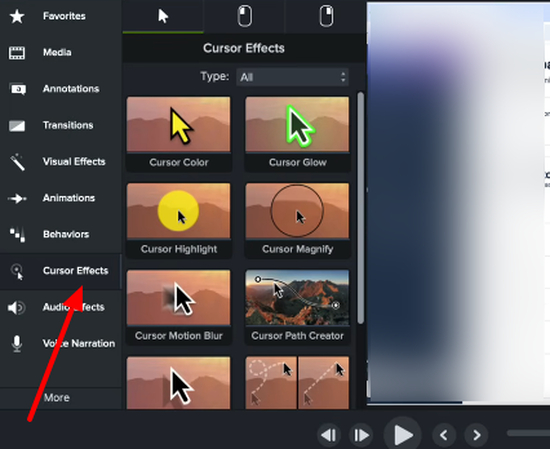
In case you have recorded a tutorial, you can experiment with the cursor. By default, Camtasia increases the cursor size to 225 percent to improve visibility. Increasing it further makes the cursor easier to see. For example, increasing it to around 350 percent can improve clarity for learners.
Step 4. Editing the Rough Cut
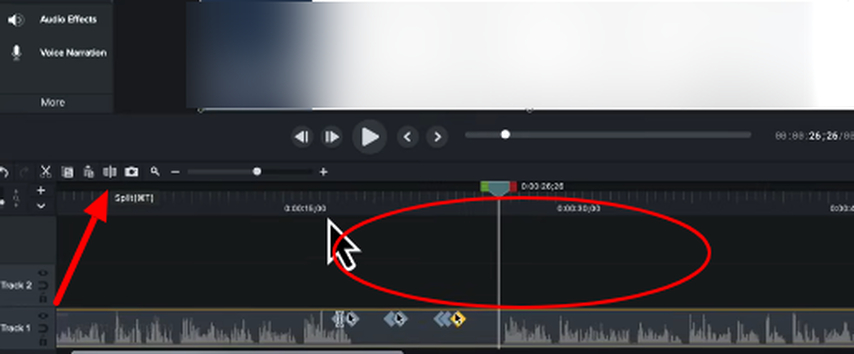
Once global effects are applied, begin editing the rough cut. This step involves removing dead space, mistakes, and repeated takes. You can zoom into the timeline for precision, then play the video and use the playhead to pause when mistakes or long pauses appear. Next, use the Split tool to cut the clip into sections. This way, you can delete unusable segments and close gaps by dragging clips together.
Step 5. Speeding Up Repetitive Actions
In many screen recordings, there are moments where the screen stays the same, and you are simply waiting for the next action to finish. These sections still matter for context, but playing them in real time slows the overall flow of the video. This is where the Clip Speed effect becomes useful.
You split the clip at the start and end of those continuous moments, then select that section on the timeline. From Visual Effects, you find Clip Speed and drag the effect directly onto the selected clip in the timeline. The effect applies only to that portion, not the entire recording.
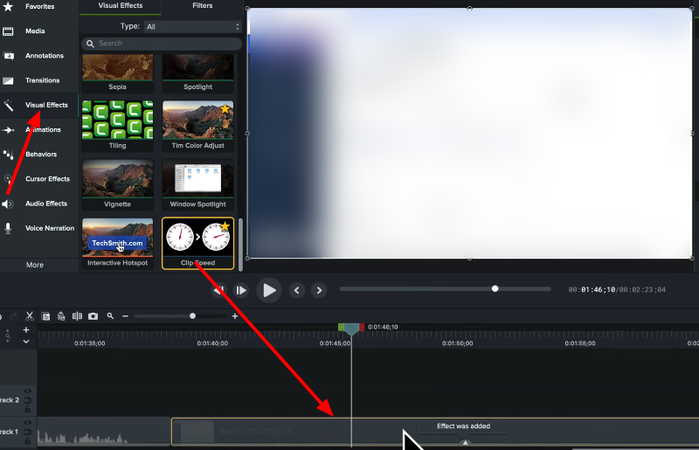
After that, adjust the speed from the Properties panel. When you increase the speed, the action is still visible but moves along much faster.
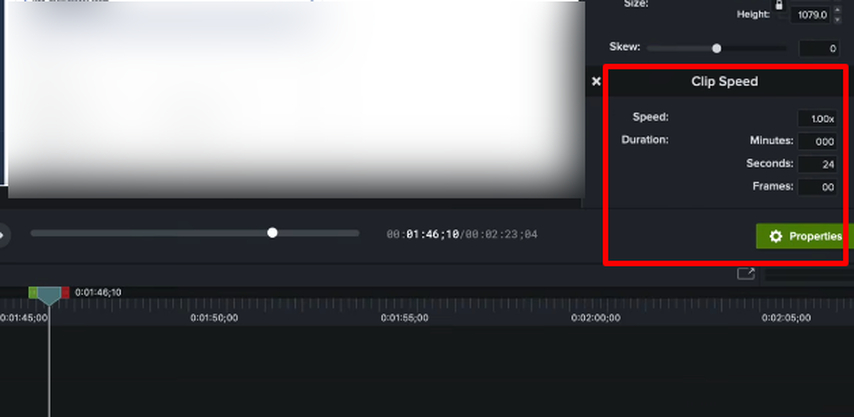
This keeps continuity intact without forcing the viewer to sit through unnecessary waiting time.
Once the sped-up section finishes, it is better to leave a short pause before normal playback continues so the transition feels smooth instead of abrupt.
Step 6. Using Transitions and Animations
There is a Transition tab as well that can help to apply smooth transitions between the clips in your screen recording.
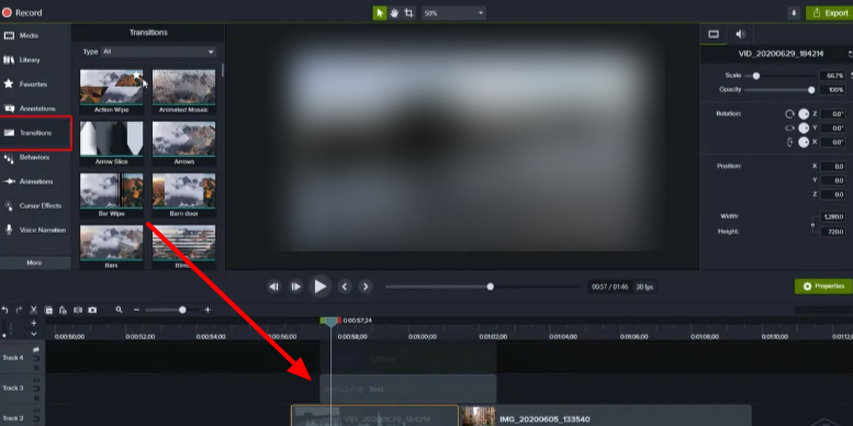
When you need a highlight to move or resize, animations help guide attention smoothly across the screen. Rather than introducing new highlights, you can let the same visual element transition naturally.
To do this, click Animations, choose Custom Animation, and drag it onto the timeline at the point where the transition should begin. With the playhead positioned at the start of the animation, you define the initial position and size.
Next, you move the playhead to the end of the animation marker and adjust the position or size again. Camtasia automatically animates the change between these two states.
To keep the transition from feeling stiff, you can adjust animation easing. Exponential easing is better because it creates smoother movement compared to linear easing, which can be a bit abrupt. This approach allows highlights to transition naturally without distracting the viewer.
Step 7. Zooming In and Out
There are moments in a screen recording where you want the viewer to focus on something. In those cases, zooming into the screen itself helps direct attention more precisely.
To do this, select the screen recording clip on the timeline. From the Animations panel, drag a Custom Animation onto the clip at the point where the zoom should begin. With the playhead positioned on the right side of the animation marker, adjust the scale of the screen recording.
You can increase the scale either by using the Properties panel or by dragging directly on the canvas. After scaling, reposition the screen so the interface element is centered and clearly visible.
Once the action finishes, add the Restore animation that reverses the zoom. This animation returns the screen to its original size and position by applying the opposite transformation of the zoom-in step, which allows the viewer to transition smoothly back to the full view.
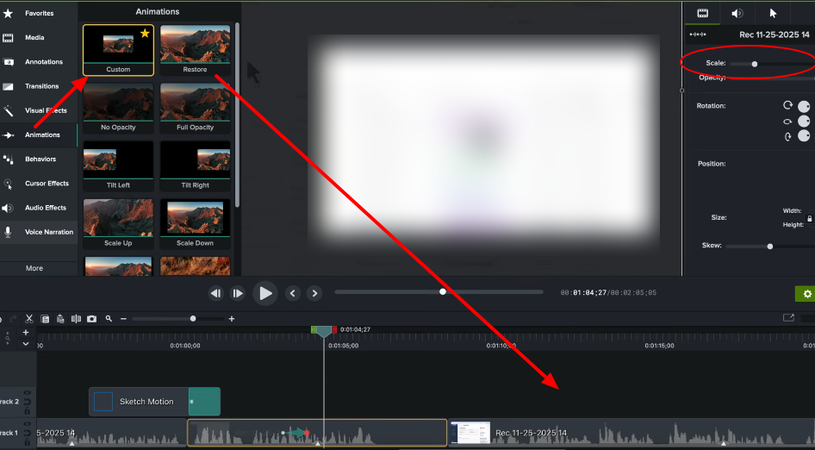
Step 8. Blurring Sensitive Information
There are times in a screen recording when sensitive information appears on the screen and should not be visible to the viewer. In those situations, blur annotations allow you to hide specific areas without affecting the rest of the recording.
Open Annotations from the sidebar and select the Blur option. Then drag any one of the Blur annotations that you want to use onto the timeline at the point where the sensitive information appears. On the canvas, resize and position the blur directly over the area that needs to be hidden.
Next, you adjust the duration of the blur on the timeline so it remains visible for as long as the sensitive content stays on screen. If the blur overlaps other visual elements, reorder the tracks so annotations remain visible above the blur.
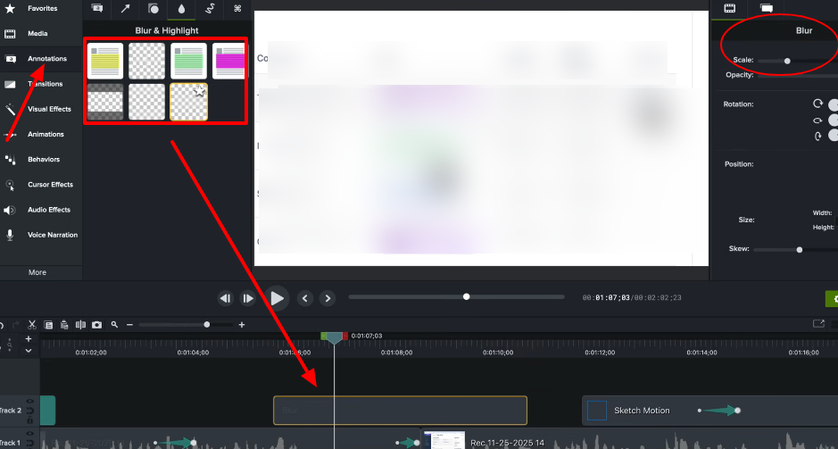
If the sensitive information moves on the screen, you can apply a Custom Animation to the blur annotation. By placing the animation marker on the timeline and adjusting the blur's position at the start and end points, the blur follows the movement of the content while staying aligned.
Once all edits, annotations, and effects are complete, review the full video from start to finish. Save the project and prepare it for export and sharing.
Part 4. FAQs of How to Use Camtasia
Q1. Is Camtasia easy to learn?
A1. Yes, Camtasia is easy to learn for beginners, due to its drag-and-drop interface, clear visual tools, and focus on screen recording. It is an excellent desktop software for creating tutorials and presentations quickly without a steep learning curve. While it lacks some advanced features of professional editors like Premiere Pro, its simplicity and built-in assets are a great resource for professional-looking results with minimal experience.
Q2. Is Camtasia free to use?
A2. Camtasia isn't entirely free, but TechSmith offers a completely free, web-based version called Camtasia Online, which is an amazing tool to capture short screen recordings with no watermark, plus a 30-day free trial for the powerful desktop editor with all features, which then requires a paid subscription for continued use without watermarks.
Q3. How much does Camtasia cost?
A3. The Camtasia desktop version has paid plans (Essentials, Create, Pro, and many others), starting from $179.88 per year, while the online version offers free screen recording, hosting (with limits), and collaboration features.
Q4. What are the cons of Camtasia?
A4. Camtasia's main cons are its high cost, being resource-intensive (requiring good RAM for large projects), and occasional performance issues like lagging and crashing, especially with heavy edits. Many users also find its editing features limited for advanced customization compared to other professional software, experiencing bugs with features like chroma key and slow rendering, and sometimes facing challenges with audio syncing or support.
Conclusion on How to Use Camtasia
In this guide, you learned how to use Camtasia so you can not only record your screen but also edit it afterward. It may not offer as many features as Premiere Pro or DaVinci Resolve, but it gives you more than enough to create professional tutorial and training videos. Hopefully, this guide helped you feel comfortable experimenting with its features on your own.



Home > Learn > How to Use Camtasia to Record Your Screen and Edit Your Captured Clip
Select the product rating:
Natalie Carter
Editor-in-Chief
My goal is to make technology feel less intimidating and more empowering. I believe digital creativity should be accessible to everyone, and I'm passionate about turning complex tools into clear, actionable guidance.
View all ArticlesLeave a Comment
Create your review for HitPaw articles