How to Add Transition in Premiere Pro: Cross Dissolve and Other Amazing Transitions Explained
If you're creating or editing your video content, strategically placed transitions can be a great way to engage your audience. And a lot of times, creating these transitions can be easier than you think. In this guide, we'll show you how to add transition in Premiere Pro and what the best built-in effects are in the software according to your needs.
Create Now!Part 1. What Is a Transition?
A transition is how you go from one shot to the next. It's all the in-between. For example, the moment of going from your desk to a couch, that's the transition, the in-between.
As an editor, you can have a lot of fun and decide what your audience sees and hears in that in-between. So maybe it's just a straight cut, and your action is what prompts a transition. A basic cut is still considered a transition.
It can also be an effect that you create using your camera, such as moving the camera away and then placing yourself in a new space for the next shot.
Finally, it can also be a built-in transition effect, like a swipe or a push that you create completely in Adobe Premiere Pro. And you do not need your camera at all to achieve it.
Whatever it is, they all count as that space in between, and how you decide to move from one shot to another.
Part 2. How Do I Add Transitions in Premiere Pro?
Today, you're talking transitions, specifically how to use and apply Premiere Pro transitions the correct way. So if you are working with two clips, the easiest way to add a transition is to follow these steps:
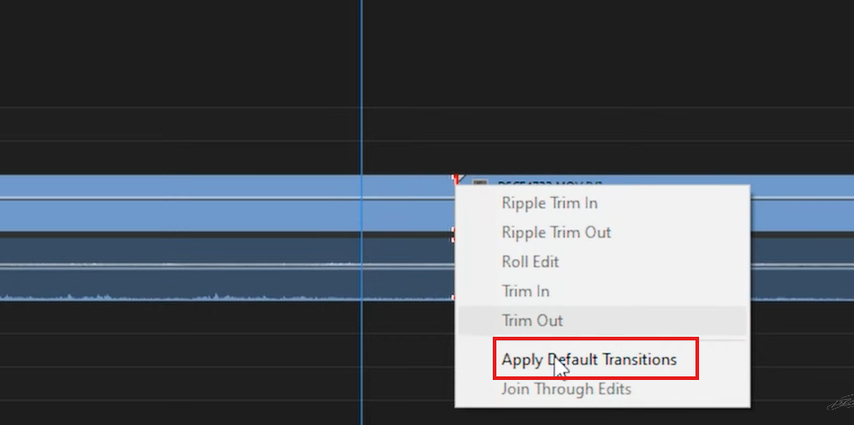
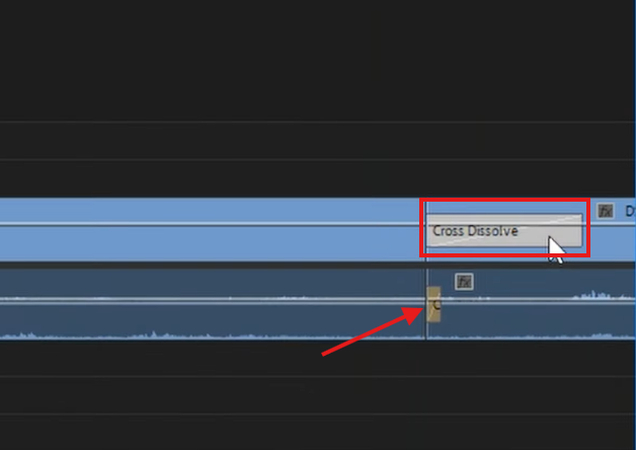
Step 1.Launch Premiere Pro on your PC, add the two clips to the timeline, go to the cut, right-click, and click on Apply Default Transitions.

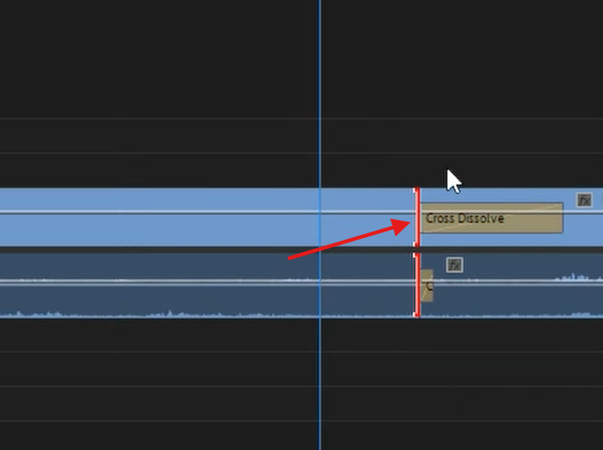
This will apply Cross Dissolve to your video track and Constant Power to your audio track.

A Cross Dissolve in Premiere Pro is a video editing transition where one clip gradually fades out while the next clip fades in, creating a smooth, overlapping blend between two scenes. This effect is commonly used to indicate the passage of time, to create a softer, more artistic cut than a hard cut, or to simply make the transition between scenes less jarring.
Constant power in Premiere Pro is the default audio crossfade that creates a smooth, gradual transition between two audio clips. It is used to avoid abrupt changes in volume and is ideal for blending speech, music, or ambient sounds for a polished, seamless sound.
Step 2.If you want to remove a transition, you just click on Cross Dissolve and press Delete.

Do the same for the audio.
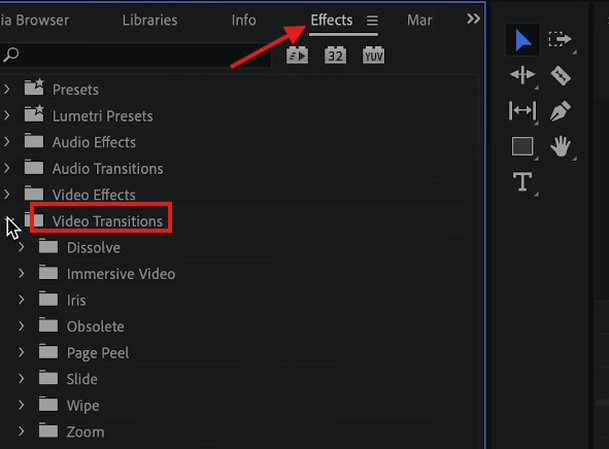
Step 3.If you want to add another transition that is built in inside Premiere, you just need to go to the Effects, go under the Video Transitions, and there are a bunch of transitions.

Part 3. How to Use Transitions in Premiere Pro
Premiere Pro offers you some amazing transitions that you can use for your project. Let's find out which of these transitions most creators choose and how to use them.
Premiere Pro Push Transition
The first common video transition in Premiere Pro is the Push transition. It is under Video Transitions > Slide. A Push transition in Premiere Pro is a video effect where one clip slides across the screen, pushing the previous clip out of view. Unlike a slide, where the incoming clip glides over the existing one, a push transition makes the outgoing clip move as the new clip enters. You can customize this transition in terms of direction (up, down, left, or right) and duration.
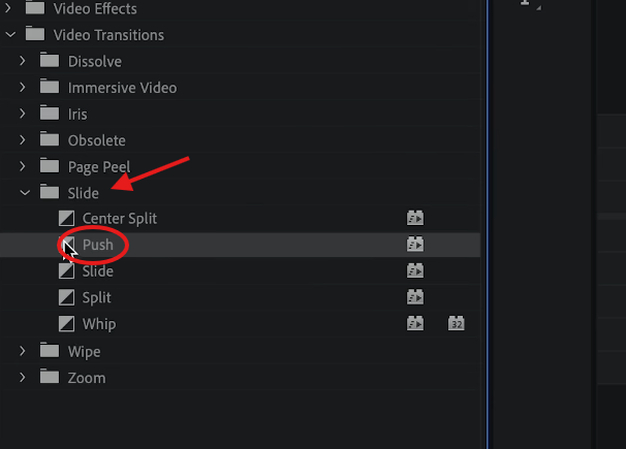
To use it, click on the Push transition and drag it in between your two clips in the timeline. Once you do that, you can see that the Push transition is in effect.
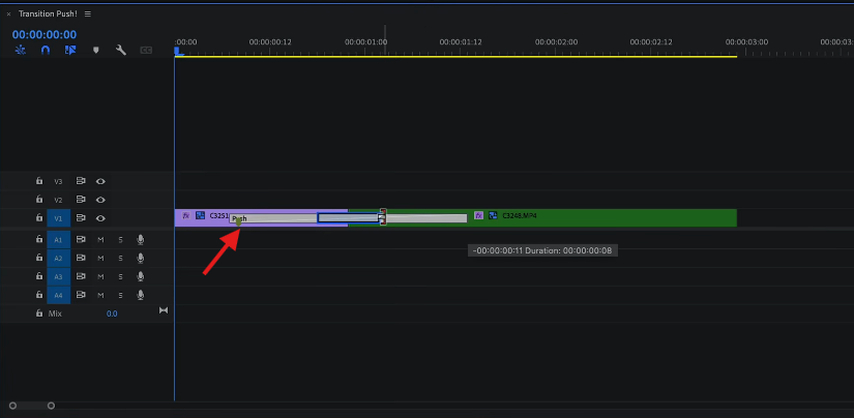
Tip: You can explore all the different transitions that are available and experiment with them. This is the Push transition after you add it to your clips.
Something you can do is change the duration of how long your Push transition takes, so you can shorten it a little bit. And something you can also do with your Push transition is click on it, go to the Effects Controls tab, and adjust the direction and duration. You'll also be pleasantly surprised just by adjusting the alignment of the transition to make it look a little different. But you can keep it centered if you prefer.
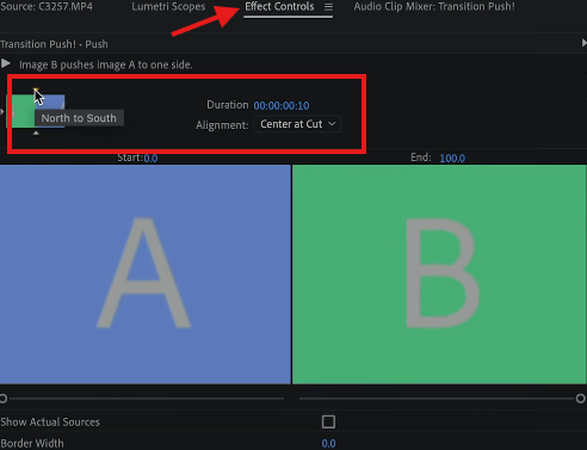
You can enhance the Push transition further to make it look more dynamic when combined with sound effects.
Match Cut Transition in Premiere Pro
One of the most useful transitions you can add to your content is the match cut. A match cut is when you take elements from the first shot and incorporate them into the next shot. For example, it could be the same prop, the same movement, or even the same sound you hear, or a combination of all of them.
A match cut works well on simple actions because it combines two different elements from the previous shot.
To apply it, the technique is a bit different as it is not available as an option under the Effects tab. First, find the exact frame where the action happens and press the O key on the keyboard to create an out point in your source monitor. Then, you can move forward slightly and drop it into your timeline.
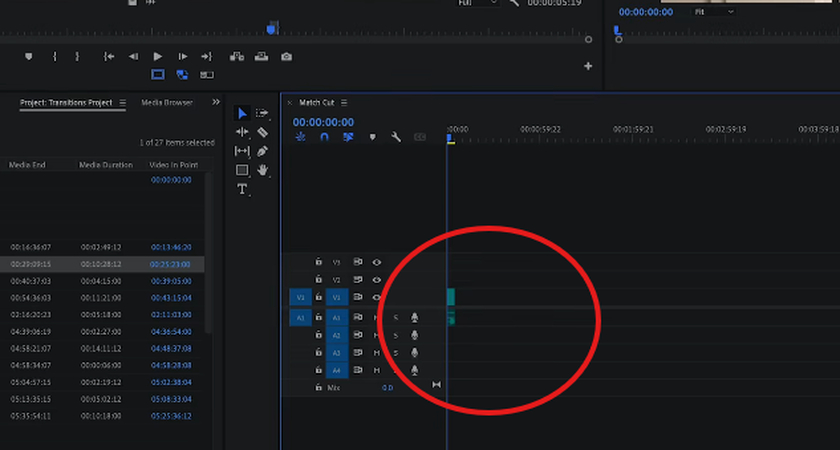
Now go to your next shot where the same action happens again and repeat the same steps. Once you find it, press the I key to create an in point, and then drag and drop the clip into your timeline as well.
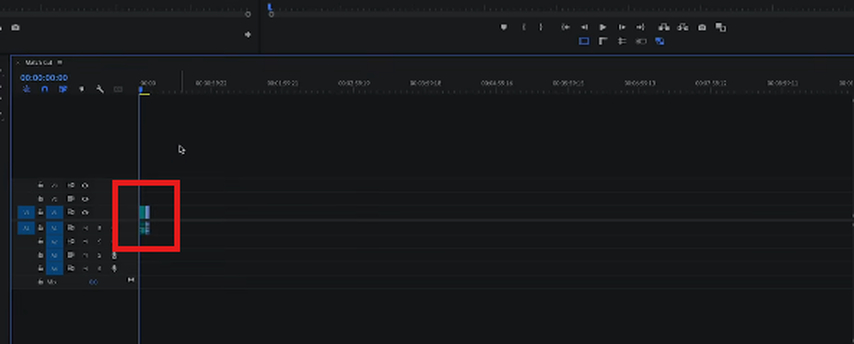
Then you can zoom in because what makes the action work is cutting on the exact action sound. Make sure your waveforms are visible, and stretch the audio track so you can clearly see where the action appears in the waveform.

If you don't see waveforms, click the wrench icon in the timeline panel and enable Show Audio Waveforms.

The best way is to align the cut directly so the match cut feels more organic. You can zoom in further by pressing the + key and moving to the exact action point. Then drag the in clip on the exact point of the out clip so the cut lines up precisely with the action.

You can now play it back to review how it looks and sounds.
Whip Pan Transition in Premiere Pro
Now, the third popular transition is the whip pan. It mimics a fast camera pan, blurring two clips together to create a seamless shift between scenes.
In Adobe Premiere Pro, the first thing you're gonna do is you're going to find where in the clip you want to whip out of frame and put an end point, and then create an out point really quickly and drop that into your timeline. Now, zoom in and go to your next shot where you are going to whip into frame and create an in right where it starts.
Now, it is time for adjustments. The thing to do is to actually cut right when it's incredibly blurry. Then take your second clip and find that point. Get rid of it and combine them to create the whip pan transition.
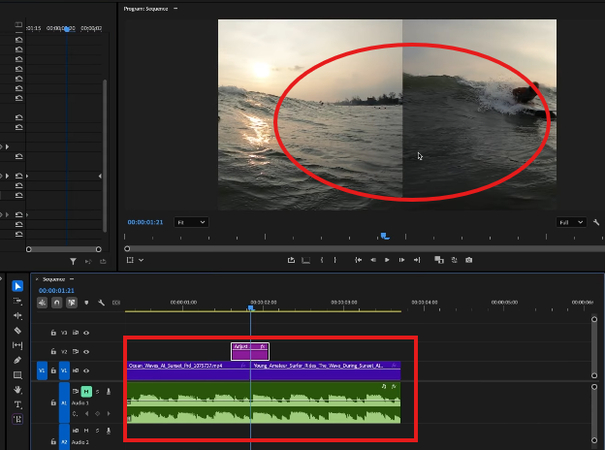
To make it a little better, if you still feel like your whip pan transition is a little wonky, the first thing you're gonna do is you're gonna unlink your audio and your video clips by pressing Command + L or Control + L on your keyboard. Then apply the default Cross Dissolve transition.
Then you scoot it really, really tight, and play it back. If your whip pans just don't seem to work as cleanly, try adding a quick little Cross Dissolve right where the two tracks meet in the transition and see if that helps.
Now all you need to do is make sure that your directional blur is lining up exactly where you want it to be. Make sure the alignment matches. Hit M on your keyboard to make a marker and then scoot it so the marker matches directly.
Jump Cut Transition in Premiere Pro
A jump cut is a transition where movement jumps forward in time faster than it naturally would. You need some planning beforehand to make sure they look the way you want and that the cut feels as seamless as possible.
When you want to add a jump cut transition in Adobe Premiere, split a clip at the exact frame where your playhead sits by pressing Command + K on a Mac or Control + K on a PC. If you want to cut the audio along with the video, use Shift + Command/Control + K for better alignment.
The next way to make clean cuts is with the Razor tool. First, drop your footage onto the timeline so you can see the full track. Then make sure the Snap setting is turned on, and your audio is locked. Snap helps the clips line up automatically, and locking the audio prevents anything from shifting out of sync when you start slicing.
After that, press C or click the Razor tool and tap the spot where you want the action to change.

Tap the Razor tool again, farther down the clip to mark where the new moment begins. These two clicks create a small cutout section you can remove. If you want to delete a chunk instantly and pull the remaining clips together, use Alt/Option + Delete. This performs a ripple delete so you don't leave empty gaps behind.
To fine-tune things, zoom in on the timeline with the + key. Getting closer to the waveform and frames helps you make cleaner, more accurate cuts. Keep trimming and adjusting until the timing looks natural.
Then play it back and review the result of the jump cut.
Part 4. FAQs of How to Add Transition in Premiere Pro
Q1. How do I add a fade transition in Premiere?
A1. To add a fade transition in Premiere Pro, select the Cross Dissolve transition under the Effects tab, and drag it to the end of your clip. If you want to change the duration of the fade, just drag the effect in.
Q2. What is Ctrl+K in Premiere Pro?
A2. Ctrl+K on Windows or Cmd+K on a Mac cuts the clip at the Playhead and splits it into two parts. It works the same way as the Razor tool but takes less effort. If you hold Shift with the shortcut, Premiere Pro cuts all active tracks at that exact point.
Q3. Why can't I put a transition between clips in Premiere Pro?
A3. When you try to apply a transition between two clips, in Premiere Pro and the transition only appears on one side of the cut, select it in the timeline and open the Effect Controls window. Look for the Alignment setting and switch it to Center at Cut. Once you do that, the transition moves into the middle of the two clips automatically.
Conclusion on How to Add Transition in Premiere Pro
If you want to get super creative with your transitions, then you should script out your shots first. It helps you see where each moment fits and how the flow should move from one part to the next. This approach lets you line up ideas before you start editing, which makes the whole process smoother when you're figuring out how to add transition in Premiere Pro.
Create Now!





Home > Learn > How to Add Transition in Premiere Pro: Cross Dissolve and Other Amazing Transitions Explained
Select the product rating:
Natalie Carter
Editor-in-Chief
My goal is to make technology feel less intimidating and more empowering. I believe digital creativity should be accessible to everyone, and I'm passionate about turning complex tools into clear, actionable guidance.
View all ArticlesLeave a Comment
Create your review for HitPaw articles