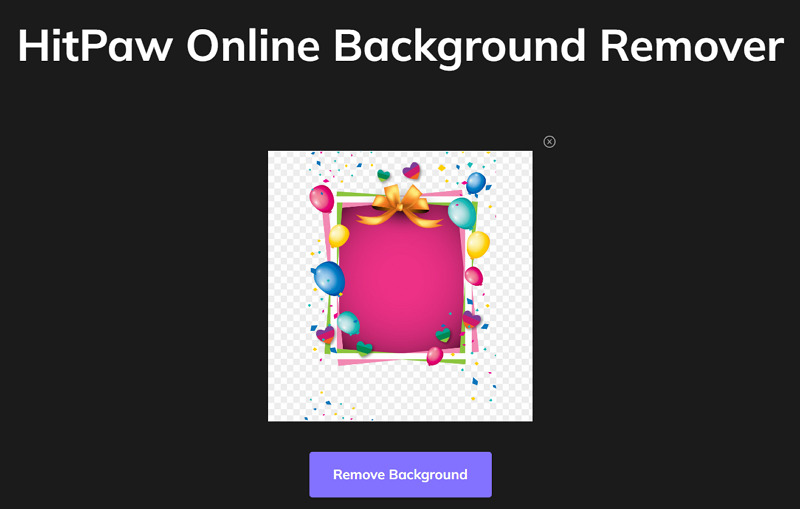
Step 01 First of all, open the official website of this online tool using the given link. Now press the “Choose File” button to import the image with the checkered background. Now you have to click the “Remove Background” button.

Whether you have created a graphic yourself or cut out the image, what you will get in the end sometimes is the checkered background. Though all your efforts were made to get the complete transparent image background, the hidden purpose is to customize it according to their desired preferences. You can remove the checkered background from an image by replacing it with the desired color before sharing it with others.
Keeping in view the fact that it becomes hard to remove this background sometimes, this guide can prove much valuable for you. It tells you about the checkered background, why you need to remove it, and how to perform this task using the top 2 software. Let’s take a plunge into their details!
A checkered background is all about the transparency of your images while working on a project. Since it’s already transparent, you don’t need to remove anything. Then why do people go for checkered background removal?
Though there exist several reasons behind it, some of them are common. The professional editors always go for customizing the background in order to enhance the visual effect. However, they want to add a customized background later per their requirements. Plus, the checkered background appears when you put this kind of image into a raster graphics editing software, so you want to replace it with the desired color.

Considering these reasons, below are the best possible ways to remove the checkered background from your image.
Do you want to remove the checkered background from the image online to keep yourself away from installation headaches? HitPaw Online Background Remover is the ultimate solution because of its outstanding performance. What it always ensures is easy and quick processing without compromising on the results. Plus, you can remove the actual background or customize the checkered background anytime. Not only does it offer complete customization control but also a fantastic list of background colors and image presets. Even you can move the object over the background layer for desired placement. Last but not least, it is possible to adjust the output image size if required efficiently.

Here are some more fantastic features to look at!
Step 01 First of all, open the official website of this online tool using the given link. Now press the “Choose File” button to import the image with the checkered background. Now you have to click the “Remove Background” button.

Step 02 Even after that, you will get the output image with the same checkered background. What to do next is to press the “Edit” tab to get the editing window. Expand the “Presets” tab under the “Background” section, which shows various colors and backgrounds to use.
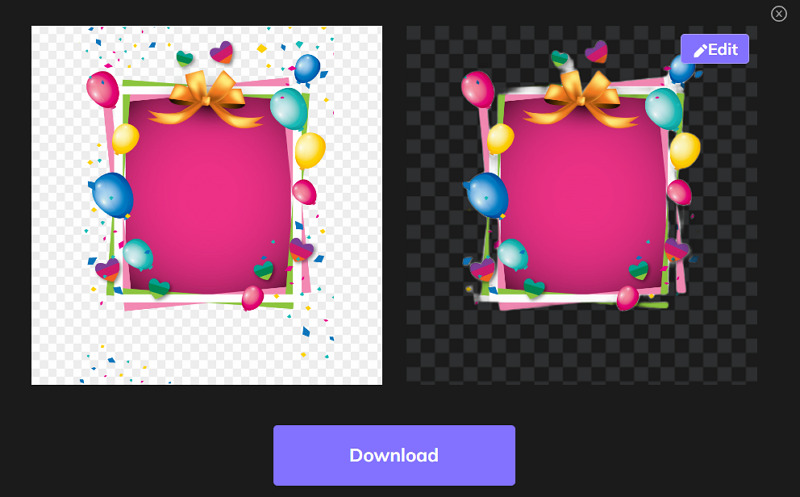
Step 03 The last step is all about choosing your favorite color or upload any photo to be your new background, adjusting the other settings, and then hitting the “Download” button present at the right bottom. That’s all!

Photoshop is a remarkable and full-fledged program to satisfy all your graphics needs. Whether you need to remove the checkered or solid background, it will come in handy for you. Considering that there is no separate layer of this background, you have nothing to remove. Even if the checkered background offers transparency, it will appear on the screen, which can be removed easily using the Grid Size and Color feature. Since the app works with adding and removing layers, you can effortlessly add one or more desired images in the background. Finally, it is even possible to use the Object Selection Tool to select checkered background in Photoshop and add another layer over that.
Pros:
Cons:
Step 01 The first step is a quick visit to their official website to download, install, and launch the software on your system. Now, click File > Open to upload the image with the checkered background.

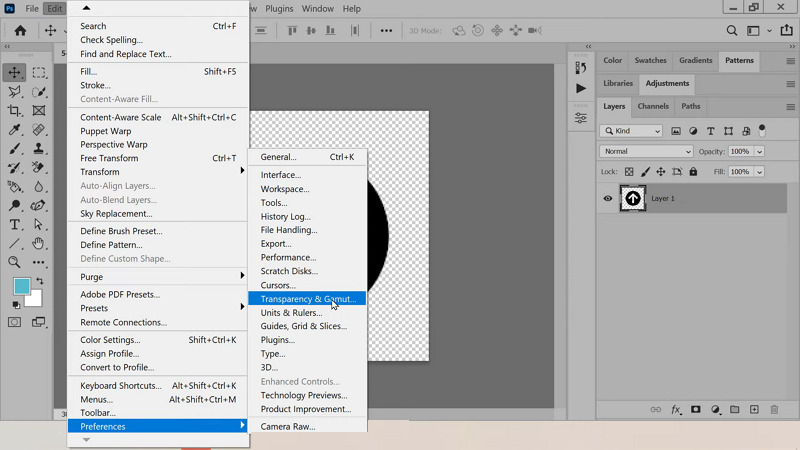
Step 02 After that, press the “Edit” button from the top menu tab, scroll down, and click Preferences > Transparency & Gamut to open up the new window.
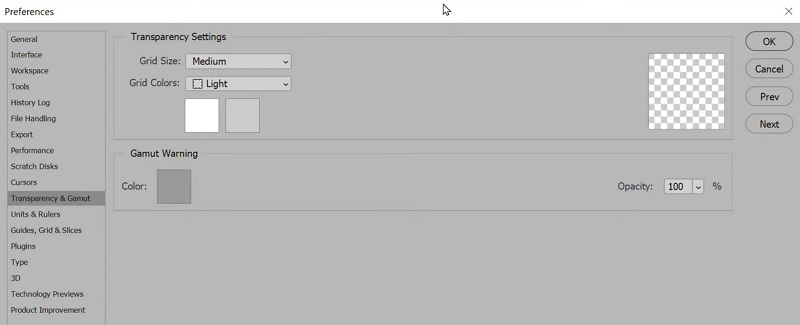
Step 03 From the “Transparency” Settings, open the “Grid Size” drop-down menu and select “None.” This will instantly turn the background color to “White.” However, if you want to choose any color or image, choose any “Grid Size” other than none.
Step 04 You have to add a new layer from the small “+” icon from the bottom right of the interface. Turn the added layer to a unique background and drag the first layer to this second layer. The background image will automatically turn to the desired one. Now export the image, and you are all done!

People, especially professionals, always try to customize the images, even those with checkered backgrounds. Although transparency is the first goal, the end purpose is customization. For such people, the above are the two best-recommended ways to use. No doubt you can opt for any method, and Photoshop is a good choice, but it’s paid. So it would be wise to go for the HitPaw Online Background Remover. Besides being a web-based tool, it provides quick and efficient processing and several fantastic features. So why not try it once?
1. Why do PNG images have a checkered background?
The checkered or white/grey background signifies the transparent image. Since transparent images like logos are primarily available in PNG format, you will see the checkered background in PNG format. However, this background is not embedded into the image. It’s just a representation!
2. How do I remove a checkered background from a PNG without Photoshop?
Many applications and software in the market offer the service of removing a checkered background from a PNG file. So you don’t have to go for Photoshop in every case. One of these efficient online tools is the HitPaw Background Removal tool, which can either achieve the checkered background or remove it quickly. Even you can replace it with solid colors/images. Before downloading, you need to upload a picture, remove the background, and select the desired color/image. All done!
3. How do I remove a checkered background in Word?
If you have a document in Docx or Word format with an inserted image with a checkered background, you can remove it easily in Microsoft Word. For this purpose, select the picture first, and then from the Picture Tools, choose Format Tab > Remove Background. Once done, press Keep Changes, and that’s all!
Recommend Product



HitPaw Watermark Remover
One Click to Remove Video / Image Watermark.

HitPaw Screen Recorder
The best solution to record in any situations.

Join the discussion and share your voice here
Leave a Comment
Create your review for HitPaw articles