Pros
- Free, open-source editor
- Allows to make changes for personal use
- Available for Mac, Windows and Linux

"New to inkscape. I have an image of a coffee table I need to remove the background from. "——Reddit
Removing the background from an image is a common photo editing technique used to highlight the main subject and create cleaner, more professional visuals. Inkscape, a free and open-source vector graphics editor, provides practical tools that allow users to remove image backgrounds with precision. To help you solve the challenge of achieving precise background removals using Inkscape's specific tools, this guide provides clear, step-by-step instructions and best practices to ensure you can efficiently create clean, professional edits.
When you remove background in Inkscape, you can better control how the subject stands out by separating it from unnecessary background elements. Unlike fully automatic tools, Inkscape offers manual and semi-automatic methods that give users more flexibility and accuracy. If you are looking for a reliable way to Inkscape remove background from photo, this guide will walk you through the available techniques and explain how each method works, helping you choose the best approach for your image editing needs.
Inkscape provides multiple methods for removing backgrounds from photos, depending on the image type and the level of precision required. Instead of using an automatic background remover, Inkscape relies on vector-based tools that allow users to control how the background is removed manually.
One of the most commonly used methods to remove background Inkscape is the Trace Bitmap feature. This tool converts raster images into vector paths by detecting edges and contrasts, making it easier to separate the main subject from the background. It works best for images with high contrast, such as logos or photos with solid-colored backgrounds.
Another effective approach to Inkscape remove background from photo is using the Bezier Tool. Many designers on the Inkscape community forums recommend using manual path clipping when working with photographs, as automatic tracing often struggles with complex backgrounds. This method involves manually outlining the subject by drawing paths around it, then removing or hiding the background layer. Although more time-consuming, it provides greater accuracy for complex images where automatic tracing may not deliver clean results. By combining these tools, Inkscape allows users to remove backgrounds with precision and flexibility.
In this section, you'll learn how to remove background from images in Inkscape using two common methods. The first method focuses on removing a white background, which is ideal for logos and simple graphics. The second method explains how Inkscape removes background from a photo using manual path clipping, which works better for complex images such as portraits or landscapes.
If you are working with logos or images that have a solid white background, this method is the most efficient way to remove background Inkscape. Inkscape’s Trace Bitmap feature allows you to convert the image into vector paths and separate the subject from the background. Follow the steps below to remove a white background from an image in Inkscape:
Step 1: Launch the Inkscape app on your PC, Mac, or Linux system.
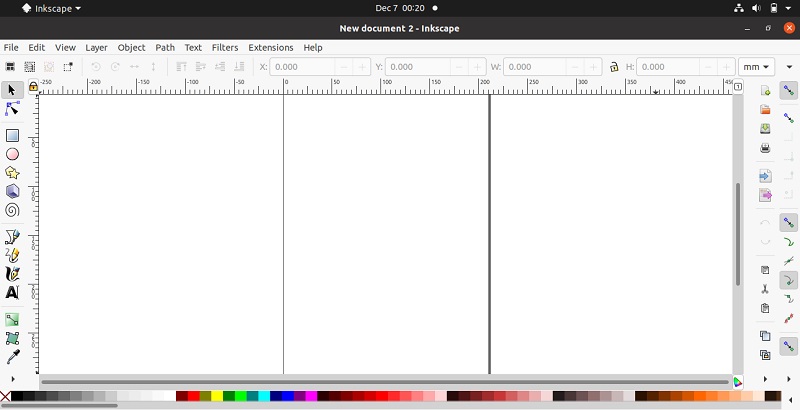
Step 2: Before you open the logo image, it is suggested to incorporate a rectangle into the drawing area of the app. This addition will be helpful to illustrate that the image has a white background. You can tap on the “Rectangles and Squares” option from the tool panel.
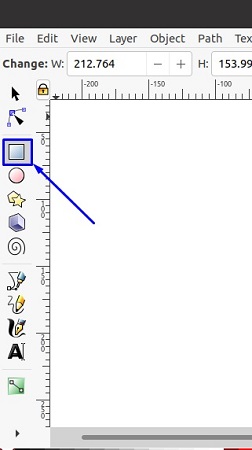
Step 3: Now, just add a rectangle to the drawing area.
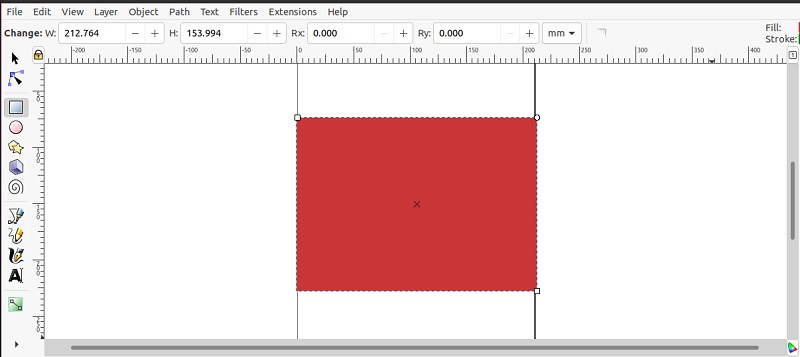
Step 4: Then, import the image for removing the background to white by opening the file menu and clicking the option to Import.
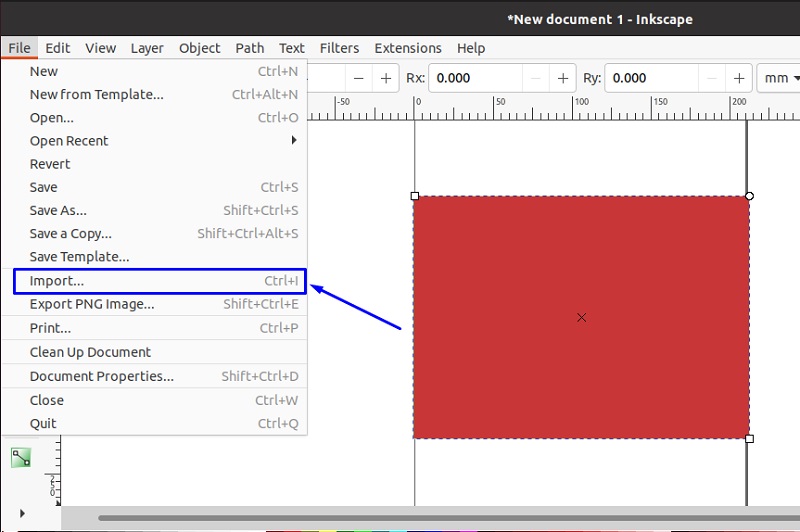
Step 5: After this, it's time to import the sample logo file to Inkscape i.e., “logo.png”.
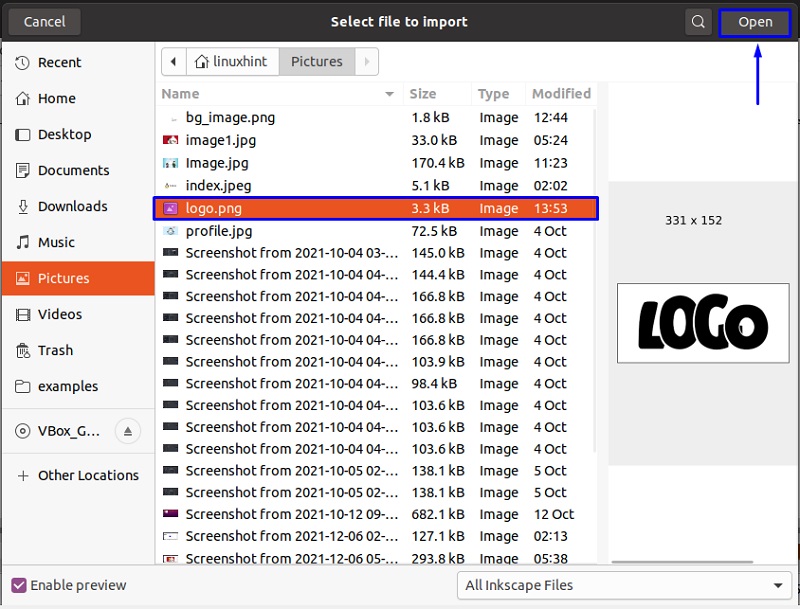
Step 6: Then, you will see a dialog appearing on the screen specifying the settings. Now, tap on Ok.
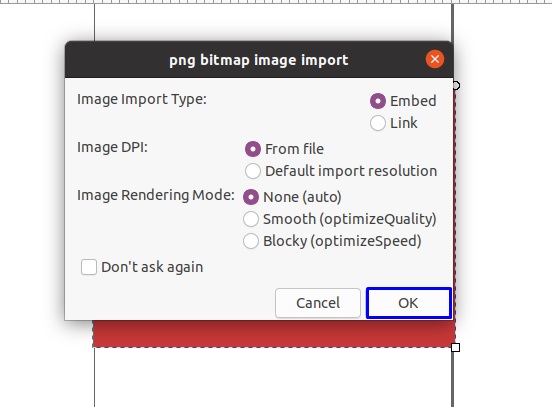
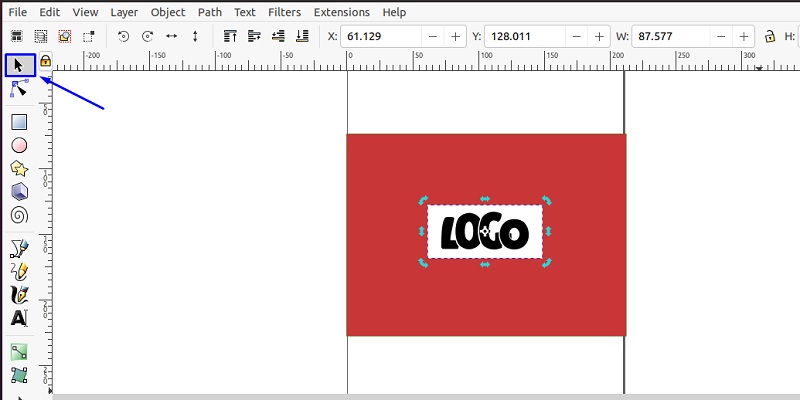
Step 7: The logo file has been imported to the app, and you shall be able to see that the rectangular shape in the backdrop has eliminated the confusion of mixing the white background of the logo image with the Inkscape app area.

Step 8: Now, from the left tool panel, tap on the “Select and transform” option.
Step 9: Then, launch the Path menu followed by selecting the Trace Bitmap using the drop-down menu.
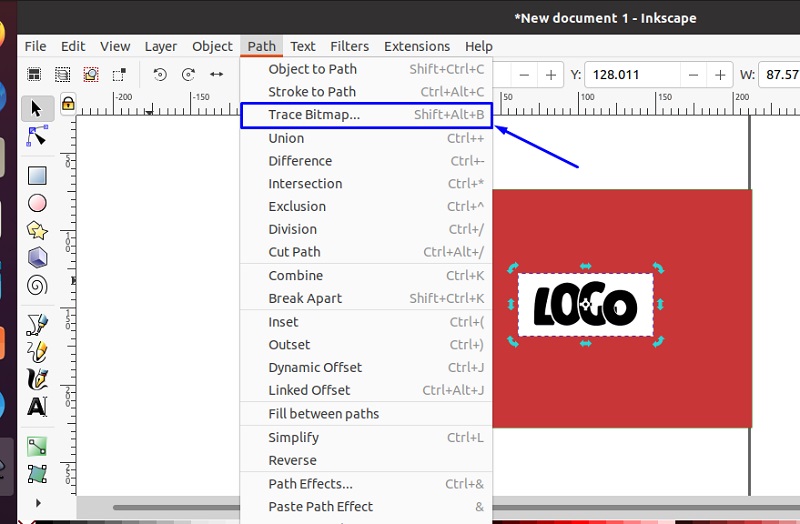
The Trace Bitmap tool works on the algorithm that creates vector tracing of the chosen image. In the dialog box of the Trace Bitmap, you can use the Single Scan tab. From there, click on the Brightness cutoff option and then select the Update button to get the preview of the traced image on the right.

Step 10: After this, from the “Multiple Scans”, check on Smooth and uncheck Remove Background.
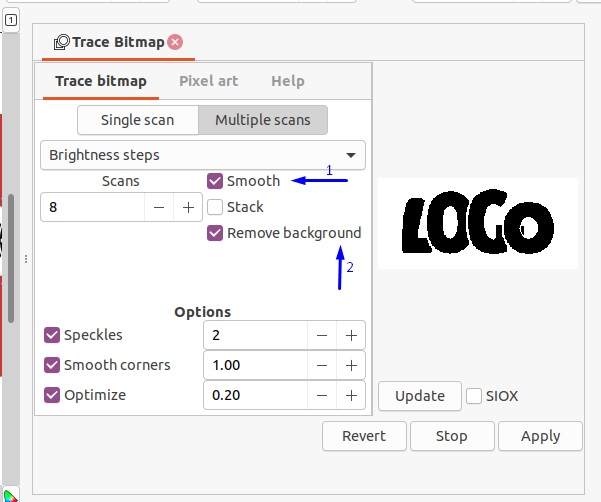
Step 11: Thereafter, tap on the Update button to view the traced logo image. Then, hit on the Apply option to save the settings.
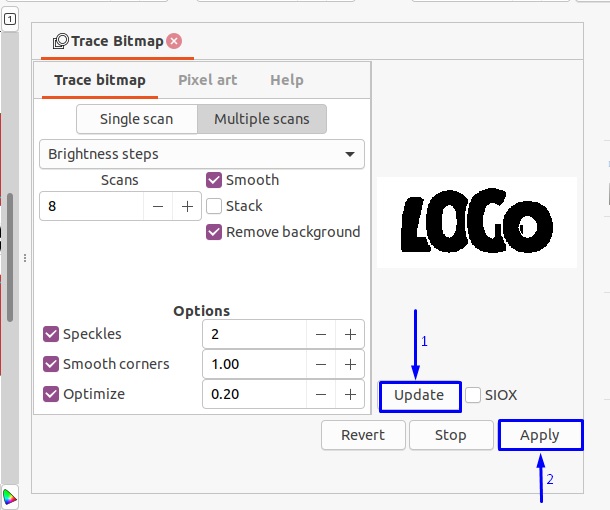
Since the “Remove Background” option was activated in the Multi scans window, the white background will be removed from the traced image.
Step 12: Now, you need to click left on the added logo image. Then, from the opened menu, hit on the option to Delete. After this, you can set the image parameters as per your choice.
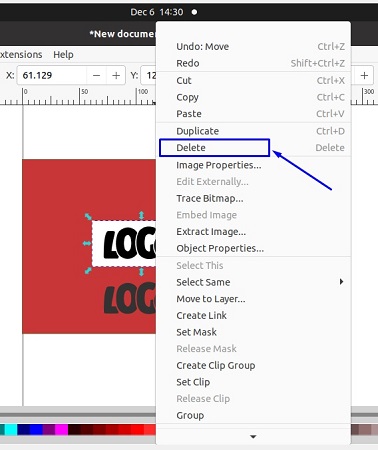
This is the most common workflow to remove background Inkscape for logos and simple images with uniform backgrounds.
For photos with complex backgrounds, such as portraits or landscape images, the Trace Bitmap method is usually not sufficient. In this case, you need a more precise approach. This method shows how Inkscape remove background from photo using manual path clipping.
Step 1: Open Inkscape and import the photo you want to edit.
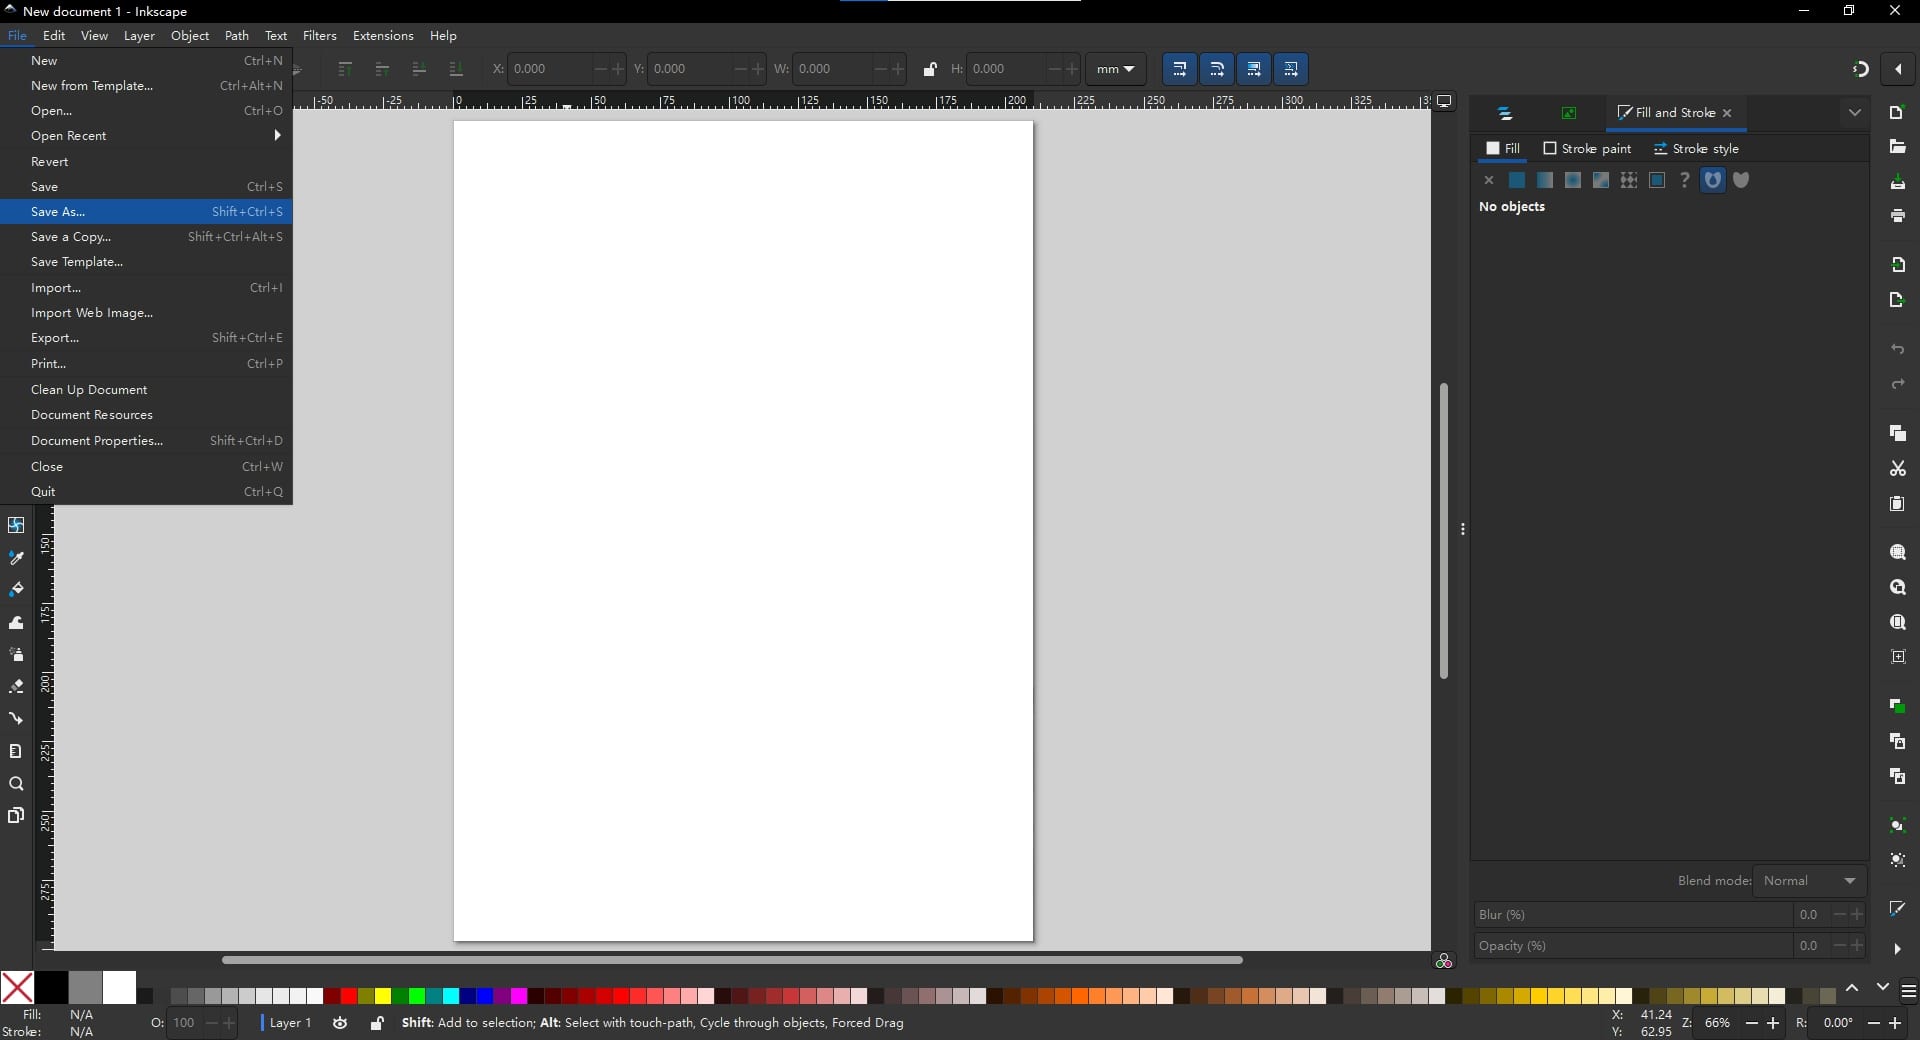
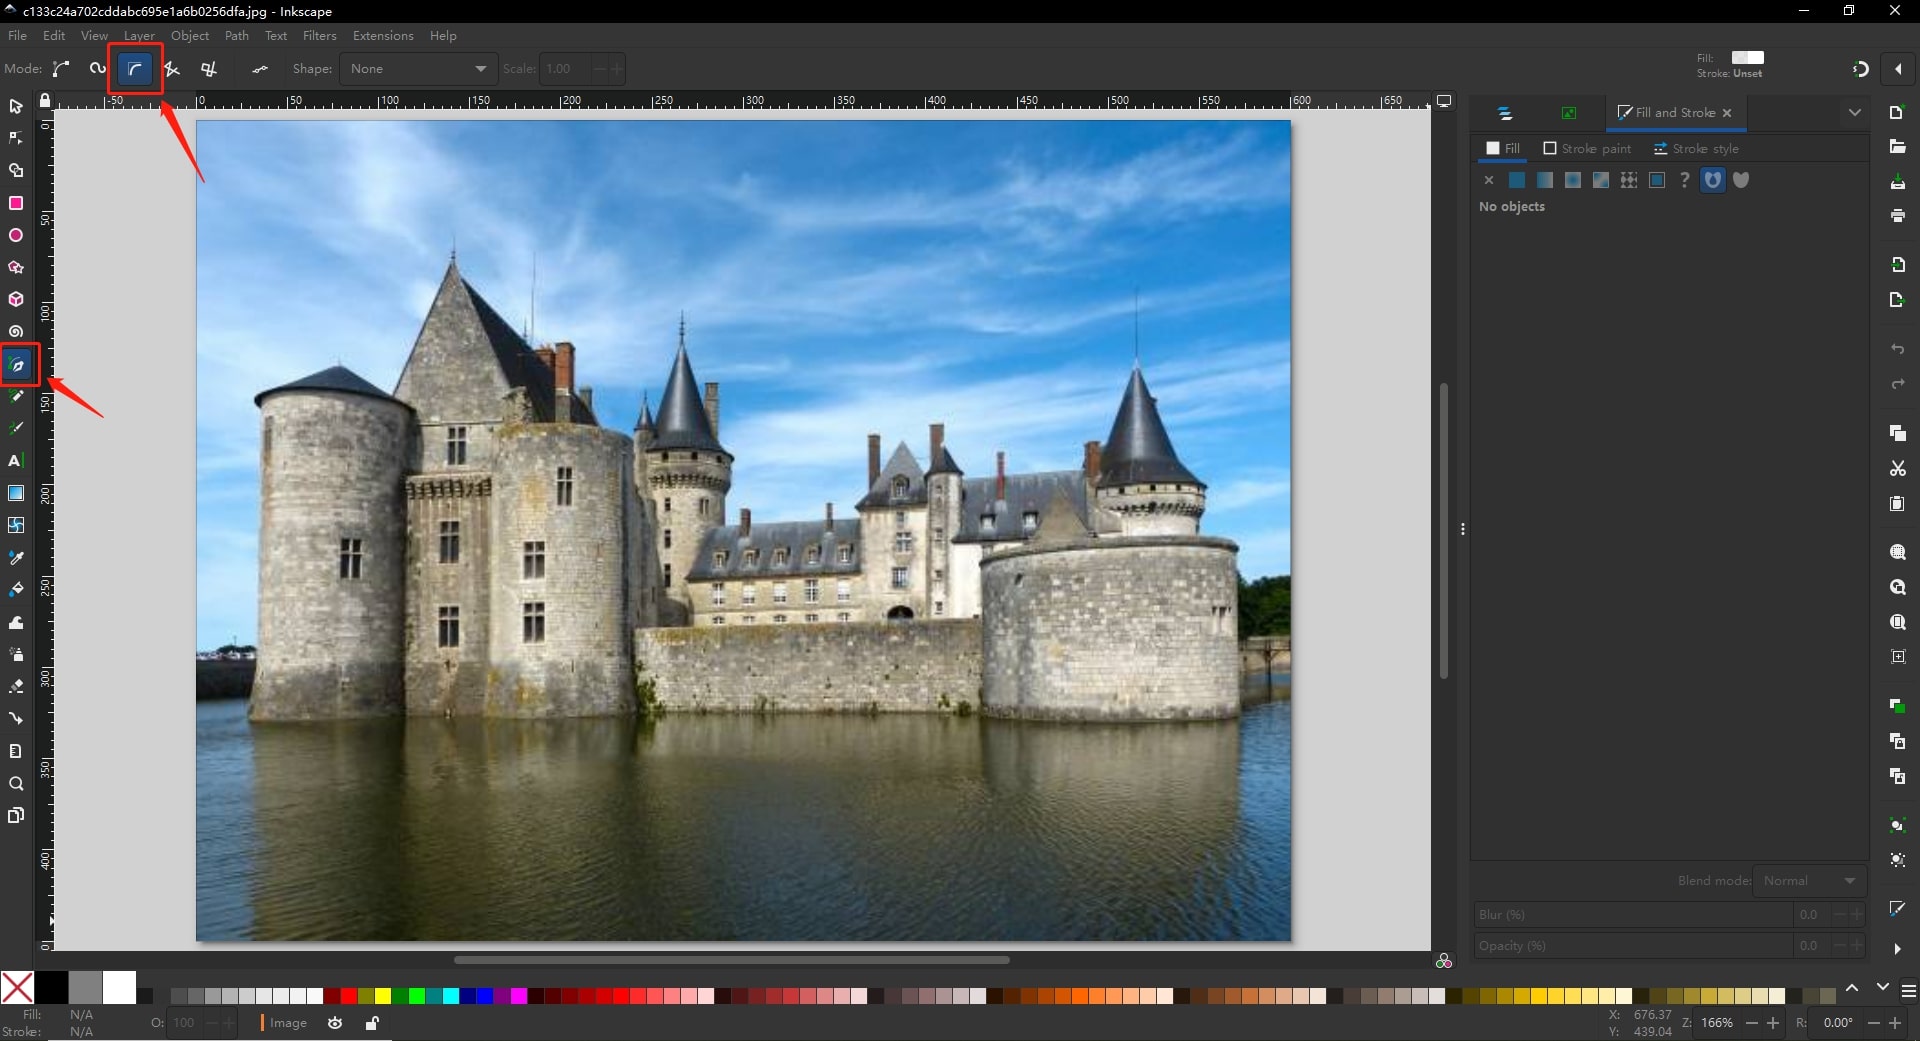
Step 2: Select the Bezier Pen tool from the toolbox, and in the tool settings, enable the "BSpline" mode for smooth curves.
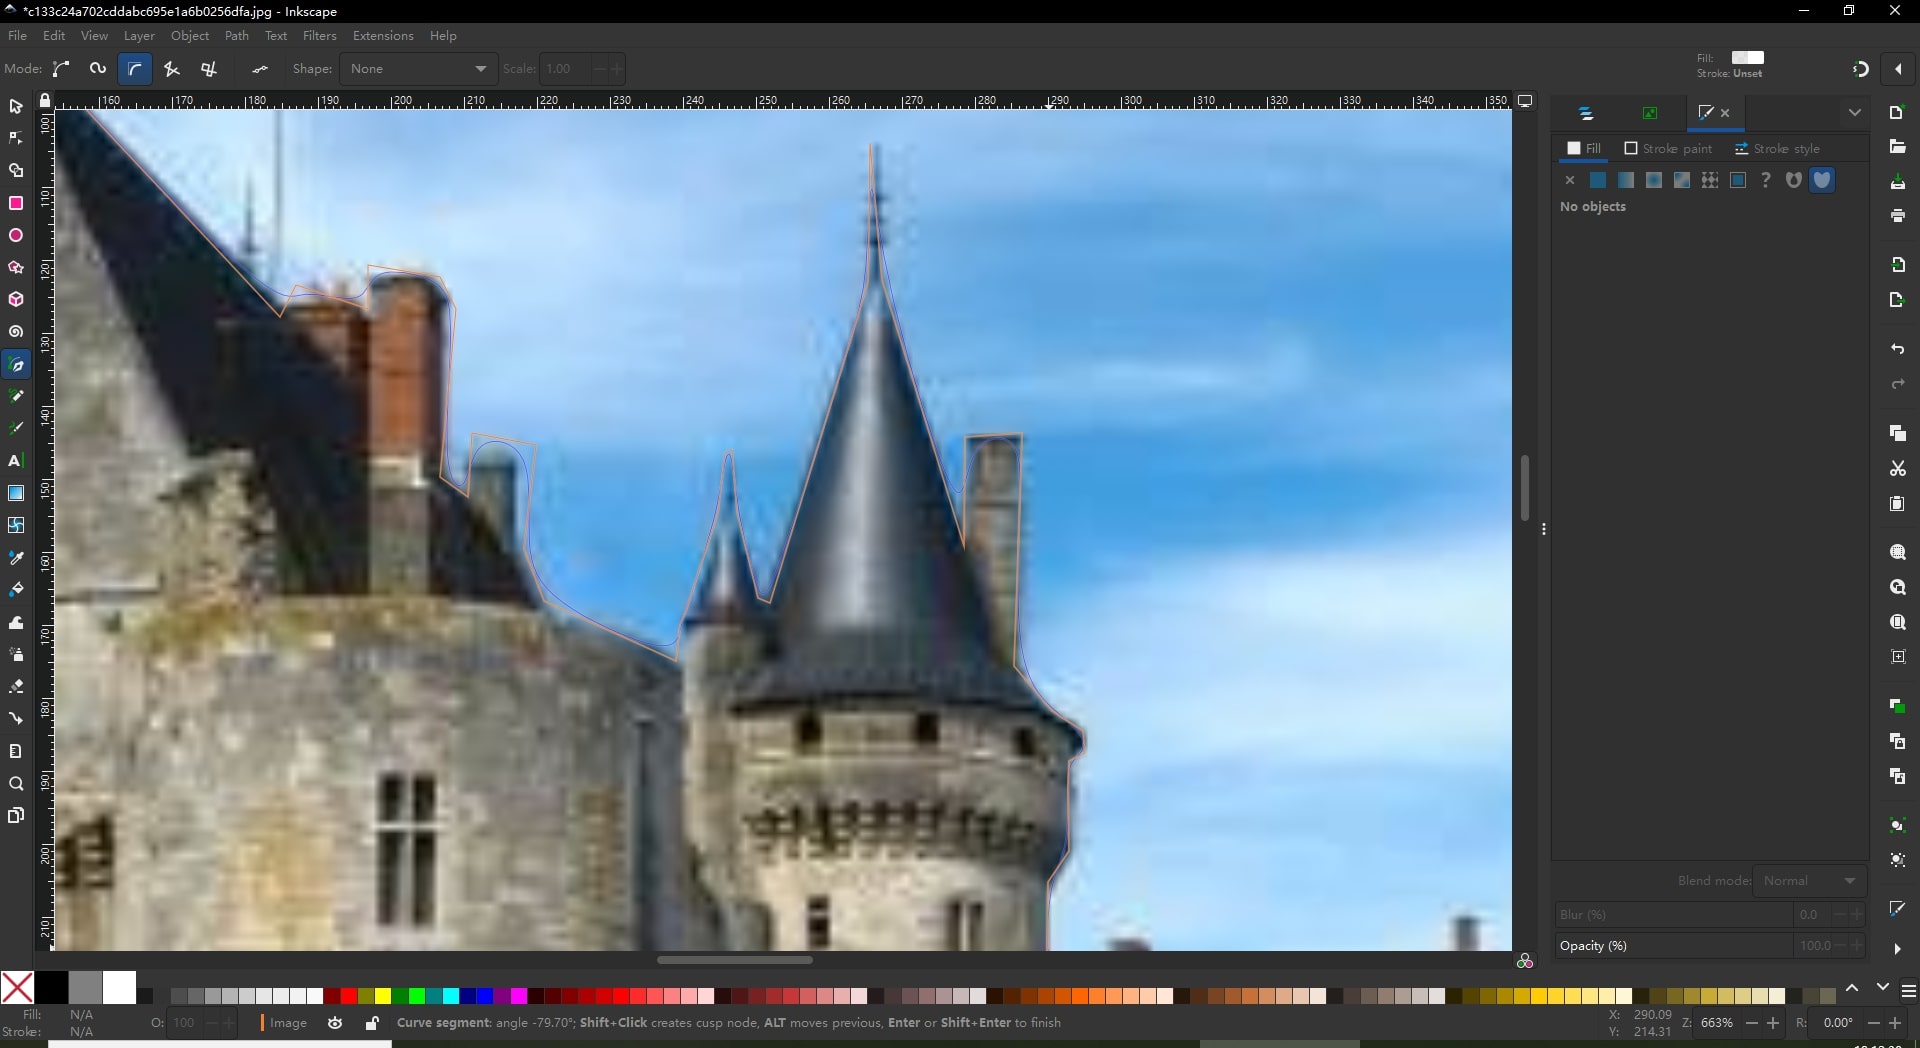
Step 3: Carefully click to add points around the subject of your photo, pulling the outline of the subject. Connect the path when you reach the starting point.
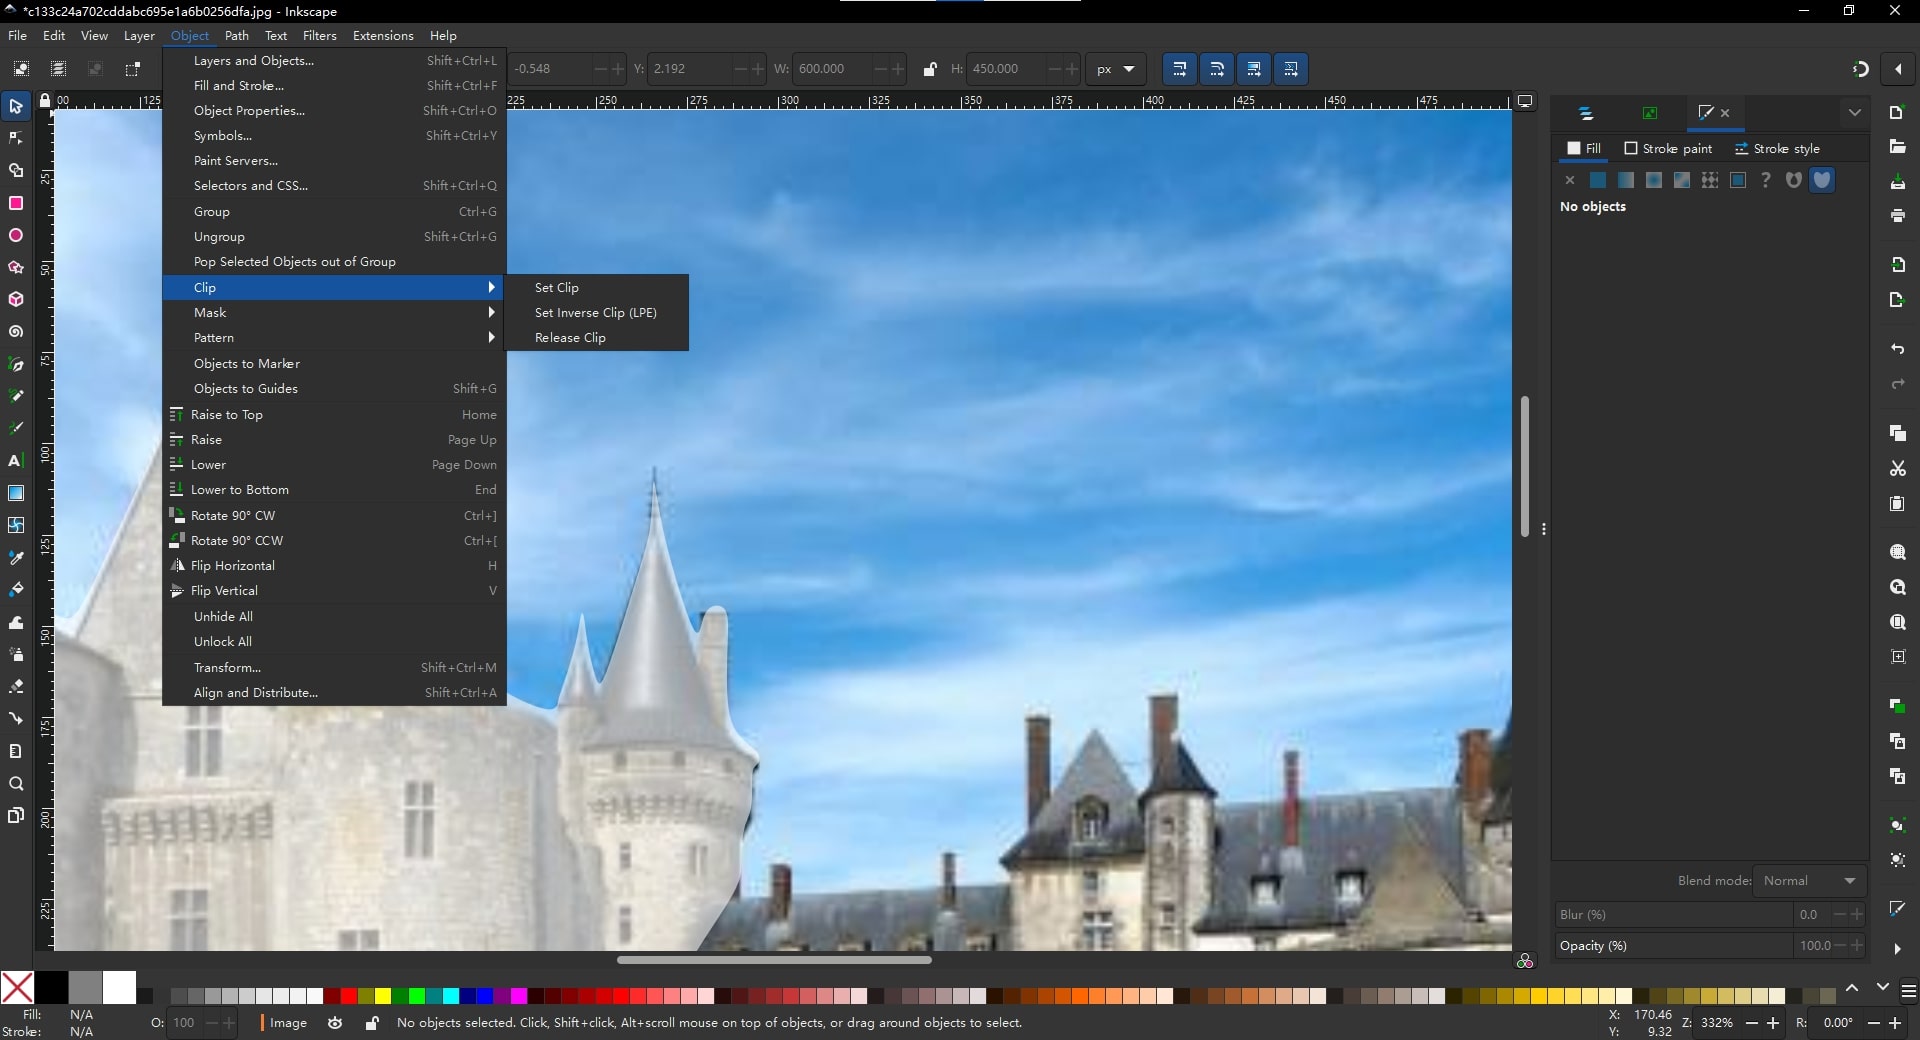
Step 4: Once the path is complete, select both the image and the path. Go to Object > Clip > Set to apply the path as a clipping mask. This will remove the background and leave only the subject of the photo visible.
Step 5: Refine the result if necessary by adjusting the nodes using the Edit paths by nodes tool.
Step 6: Save or export the final image as a PNG.
Now that you understand how to remove a background in Inkscape, it’s important to consider the advantages and limitations of using this tool before choosing it for your workflow.
Pros
Cons
Inkscape is a powerful solution to remove background Inkscape, but it may feel complex for beginners or users who want faster results. If you are looking for a simpler option, tools like HitPaw Online Background Remover provide an easier alternative. While not as advanced as Inkscape, it allows users to remove image backgrounds quickly with minimal effort.
From any web browser, visit the official site to access the HitPaw Online Background Remover. Click Remove BG Now to start. You can also download the desktop version for free to get HitPaw's more advanced background removal features.

In the Online Background Remover toolkit, click Choose Images to upload your file and start removing the background automatically.

After the background removal, click the Download button to download the transparent image.

Q1. How to remove white background and keep white image areas in Inkscape?
A1. To remove the white background while preserving white areas in the image, first, convert the white areas you want to keep into gray using either an external graphic editor or Inkscape's color settings. Then, use the Trace Bitmap tool with the “Remove background” option enabled. After tracing, change the gray areas back to white and reassemble the layers for a clean result.
Q2. How to remove black background and keep white image areas in Inkscape?
A2. For removing a black background but keeping white areas intact, use the Trace Bitmap tool and select the "Invert image" option. After tracing, the image will appear in black. Simply open the Fill and Stroke dialog and change the black areas to white to preserve the desired white regions. However, if you use a state-of-the-art AI-powered tool like HitPaw Online Background Remover, the job of removing the image background will be much easier.
The Bottom Line
This guide has shown you how to remove background from an image in Inkscape using different methods, including Trace Bitmap for simple backgrounds and manual path clipping for more complex photos. Inkscape is a powerful and flexible tool, especially for users who are comfortable with vector-based editing and detailed adjustments. If you need precise control for logos or vector assets, Inkscape is a solid choice. For quick background removal from photos, automated tools may be more efficient. Tools like HitPaw Online Background Remover allow you to remove background from images automatically in just a few clicks, without advanced editing skills. Choose the method that best fits your experience level and project requirements to achieve clean, professional-looking images.
Recommend Product


HitPaw Edimakor
Create standout videos with simple clicks.

HitPaw Watermark Remover
One Click to Remove Video / Image Watermark.

Join the discussion and share your voice here
Leave a Comment
Create your review for HitPaw articles