


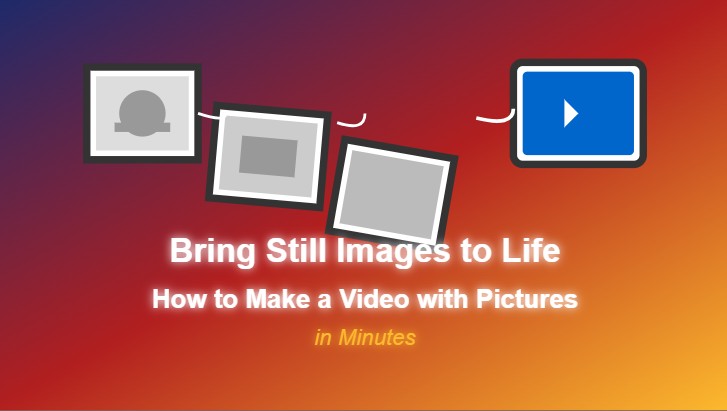
How To Create Videos From Images In FFmpeg: Quick Method
Instead of relying on downloading software and learning all about it, you can run a single command on FFmpeg to generate smooth, high-quality vidoe outputs from images. By setting options like frame rate, resolution, and format, you gain full control over the result. No matter if your goal is efficiency or precision, FFmpeg offers a free, fast, and reliable way to take your still images and turn them into an amazing video file. Let's explore all about this tool in this guide for this task.
Create Now!Part 1. What is the FFmpeg Pictures to Video Tool?
FFmpeg is a free, open-source multimedia framework that provides you with a set of features to handle audio and video files. It's a command-line tool used for tasks like converting, editing, and streaming multimedia. The name "FFmpeg" is derived from "Fast Forward" and "Moving Picture Experts Group".
In the context of creating videos, it plays a key role by assembling still images into smooth clips with precise control over frame rate, resolution, color range, and compression format.
This makes it especially useful when working with large batches of image files or when you need to repeat the same process across multiple projects. It supports nearly every video and image format for different workflows.
If you have images captured from a camera or your phone that you want to turn into a video-whether for a simple slideshow, a high-quality ProRes file, or a lightweight MP4 -FFmpeg handles all of it. It's not just a converter; it's a tool built for precision and flexibility in post-production tasks.
Part 2. Prerequisites for FFmpeg Pictures to Video
If your main objective here is to create videos from Images In FFmpeg, there should be a starting point and the core goal. To do this successfully, the images must be arranged in sequential order. They should be stored in a folder you can easily access.
You can use the filenames as they came out of your digital camera or your phone, provided they are numbered sequentially and don't wrap around. For instance, the numbers must progress logically-000001, 000002, and so on. The files should be in a compatible image format such as JPEG or HEIF. If your source material consists of RAW images, you'll need to convert those to JPEG or another supported format before you proceed with the FFmpeg Images to Video process.
For this example, assume there is a folder containing a time-lapse sequence where the images are already named using a six-digit number format starting from 000001.jpeg.
The next important step is deciding the frame rate for your video output. This could be 24 fps, 30 fps, 50 fps, or even 60 fps, depending on your target format or destination.
If you're working with NTSC frame rates such as 23.976 fps (which is technically 24000/1001), it's recommended to use the actual fractional format when encoding. This will provide better compatibility and accuracy. Instead of writing 23.976, you can use 24000/1001.
This method avoids rounding errors and ensures the proper interpretation by FFmpeg and downstream video editing software. Still, if you're aiming for general playback, common frame rates like 24, 30, or 60 will also work in most scenarios without any major issues.
Part 3. Building the Command for FFmpeg Image Sequence to Video
To make a video from your images, you'll need a command, and there is a way to build it correctly. Let's discover the steps:
Setting the Input Frame Rate
Start your command with ffmpeg, which is the base command for any operation using the tool.
After that, specify the input frame rate using the -framerate option. This determines how many images will be used per second of video. For example:
ffmpeg -framerate 24000/1001
This sets the input sequence to play at approximately 24 frames per second NTSC frame rate. It's essential to get this right at the beginning because this is how FFmpeg interprets the speed of the source image sequence.
Specifying the Input Files
Now it's time to point FFmpeg to the images. Since you're working with a sequence of numbered images, use the -i flag to indicate input files.
If your images are named like 000001.jpeg, 000002.jpeg, etc., use:
ffmpeg -framerate 24000/1001 -i %06d.jpg
This tells FFmpeg that the input files have six-digit numbers with leading zeroes and that they are JPEGs. Here's how it breaks down:
- % indicates a pattern that is the start of an image sequence modifier.
- 0 indicates leading zeros.
- 6d specifies 6 digits in total in that file number sequence.
- .jpg is the file extension of your stored images
If your images are named differently, adjust the pattern. For instance, if your files are called IMG_0001.jpeg, type in:
ffmpeg -framerate 24000/1001 -i IMG_%04d.jpg
If the name has a prefix like er5_0001.jpeg, use:
ffmpeg -framerate 24000/1001 -i er5_%04d.jpg
If your images are in different formats like PNG, DPX, or others, just use their extension names instead of .jpg. FFmpeg will then match the file pattern accordingly.
Filtering and Color Range Conversion
Next up is filtering and processing. You only need one filter to rescale the values. By default, still images are often stored in full-range color, but many video formats, especially those used in broadcasting or post-production, expect limited-range video levels. This means the color data might need to be scaled accordingly.
To handle this, apply a video filter like this:
-filter:v scale=in_range=full:out_range=limited
This tells FFmpeg to convert from full-range color (as found in still images) to limited-range video color. This step is especially important if you're targeting formats like ProRes, which assume a limited range by default.
Now, the whole command looks like this up till now:
ffmpeg -framerate 24000/1001 -i er5_%04d.jpg -filter:v scale=in_range=full:out_range=limited
Output Settings Using ProRes
Now that the input and filtering stages are configured, move on to defining the output.
If you're doing this on a Mac, you can take advantage of hardware acceleration and encode to ProRes using:
-c:v prores_videotoolbox
For Windows or Linux systems that lack VideoToolbox, use:
-c:v prores
Next, set the ProRes profile. For instance, use ProRes LT, which is a lightweight option:
-profile:v 1
This profile gives you a good balance of quality and file size.
ProRes LT also expects 10-bit 4:2:2 chroma subsampling. To meet this requirement, set the pixel format using:
-pix_fmt yuv422p10le
Finally, you're ready to save the output file. Choose a name such as:
sequenced.mov
Final Command (ProRes Example)
Here's the complete command using ProRes with all settings:
ffmpeg -framerate 24000/1001 -i er5_%04d.jpg -filter:v scale=in_range=full:out_range=limited -c:v prores_videotoolbox -profile:v 1 -pix_fmt yuv422p10le sequenced.mov
Part 4. Create Videos from Images FFmpeg: HEVC MP4
If you want to create an HEVC (H.265) MP4 file instead, you don't need to start from scratch. The input and framerate sections remain exactly the same. In an HEVC MP4 file, full range data is actually legal, so we can just get rid of the filter section.
Start by changing the codec. Use the software-based encoder:
-c:v libx265
On macOS, for hardware acceleration, you can use:
-c:v hevc_videotoolbox
Next, specify your desired video quality. The CRF (Constant Rate Factor) is a good way to do this:
-crf 15
This value gives you high-quality and manageable file sizes. A lower value, like 10, will increase quality and file size; a higher value, like 28, will reduce both.
Now choose the chroma subsampling and bit depth. Most devices support 4:2:0 chroma and 8-bit color best, so for maximum compatibility, use:
-pix_fmt yuv420p
If you prefer better color fidelity and your playback devices support it, you can use yuv422p10le, but 4:2:0 8-bit is usually sufficient.
Set the output file name:
sequenced.mp4
So, here is what the final command in FFmpeg will look like while converting sequenced images to video in HEVC:
ffmpeg -framerate 24000/1001 -i %06d.jpeg -c:v libx265 -crf 15 -pix_fmt yuv420p sequenced.mp4
Part 5. Other Things FFmpeg Images to Video Can Do
FFmpeg isn't just for encoding images into video; it's also used for encoding audio into video. There are other powerful features worth exploring.
You can simulate motion blur using motion interpolation filters. This is useful when you want smoother motion or more cinematic effects in your time-lapse videos.
The filters you can try are "minterpolate" and "tmix."
Minterpolate creates intermediate frames by estimating motion between frames, which can smooth out time-lapses that otherwise look choppy. Tmix blends adjacent frames and creates a ghosting-style blur.
Keep in mind:
- These processes are very slow.
- You may get only 1 frame per second or less, even on a fast machine.
- Results vary depending on how much motion is present in the image sequence.
Some videos will benefit from motion blur filters, others may look worse. It all depends on the nature of the source material. You'll need to test different filter parameters and use trial and error to get the best results.
Both minterpolate and tmix have detailed documentation on the FFmpeg website, which you should consult for advanced usage.
Part 6. An Easier Way to Convert Images to a Video with HitPaw Online AI Video Generator
There's another way to create videos from your image to avoid the hassle of using command-based tools like FFmpeg. HitPaw Online AI Video Generator only requires you to upload your images and take care of the rest. Here's how:
Step 1.Visit the HitPaw AI Video Generator site and click the "Image to Video" tool.

Step 2.Click "Drag or click to add images" to select images from your PC in WEBP, JPG, and JPEG files up to 20MB in size, with maximum dimensions of 4000 pixels. Upload the image in a sequence. To do this, upload one photo, then turn on "Add End Frame" and add another photo. Repeat to upload multiple images in a sequence.
Step 3.Lastly, apply other settings, such as selecting a resolution, video length, aspect ratio, and negative prompts, to exclude specific elements from the final video. Then, click "Generate" and download your video, which has been generated from the images.
Part 7. FAQs of FFmpeg Images to Video
Q1. Can FFmpeg handle images?
A1. Yes, FFmpeg can handle image sequences and convert them into video files. It supports common formats like JPEG, PNG, HEIF, and more. You can specify image patterns, apply filters, adjust frame rates, and output the result into various video formats-all directly from the command line.
Q2. How to make MP4 from images?
A2. With HitPaw Video Generator, you can upload images in sequence using the Image to Video tool. Then, set resolution, video length, duration, aspect ratio, and click "Generate" to get the video in MP4 format. No manual commands or complex setup required.
Q3. Can you convert a JPEG to MP4?
A3. Yes, FFmpeg can convert JPEG images into an MP4 video by reading a sequence of images and encoding them with a video codec. However, if you prefer a faster, user-friendly option, HitPaw AI Video Generator offers a simpler way to upload images and export them directly as MP4.
Conclusion on FFmpeg Images to Video
Using FFmpeg to create time-lapse videos from images is a flexible and powerful process. Whether you're exporting to ProRes for editing or HEVC for sharing, FFmpeg offers control over every aspect of encoding. Once you're familiar with the commands, you can build presets and scripts for repeated use in your workflow.
However, if you don't like using the commands or the command-line interface of FFmpeg, try HitPaw AI Video Generator, which can create a video from a sequence of uploaded images within a minute.


Home > Learn > How To Create Videos From Images In FFmpeg: Quick Method
Select the product rating:
Natalie Carter
Editor-in-Chief
My goal is to make technology feel less intimidating and more empowering. I believe digital creativity should be accessible to everyone, and I'm passionate about turning complex tools into clear, actionable guidance.
View all ArticlesLeave a Comment
Create your review for HitPaw articles